
Main Courses
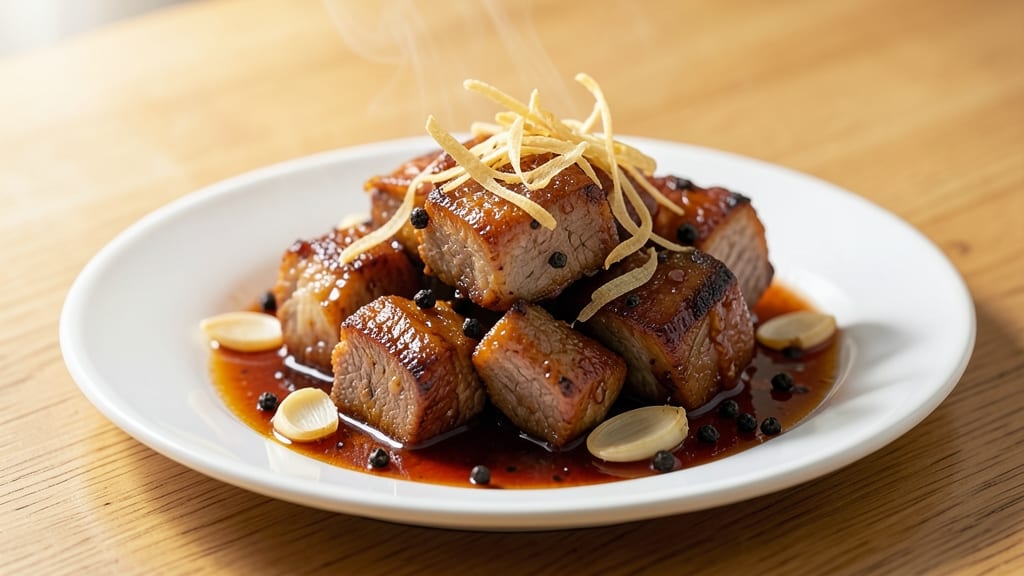
Adobong Tuyo pork recipe transforms simple pork belly into crispy, caramelized bites with a smoky-sweet soy-vinegar glaze—just like my abuela used to make. This dish balances the tang of vinegar with deep umami from soy and garlic, creating a perfect harmony of textures and flavors. The key lies in slow braising until the pork becomes fork-tender, then crisping it to golden perfection.
What makes this recipe special is the dual cooking method: first simmered in a rich adobo sauce until tender, then seared to achieve that irresistible crispy exterior. I've perfected this technique over years of cooking for large gatherings, ensuring every bite delivers both texture and flavor.
The dish pairs beautifully with steamed rice, where the pork soaks up the aromatic sauce.
By the time you're done, you'll have a dish that's rich, savory, and slightly sweet—with that signature crispy edge that makes it impossible to stop eating. The aroma alone will fill your kitchen with warmth, transporting you straight to a Filipino family dinner.
This recipe is my tribute to the dishes that shaped my childhood, adapted for modern kitchens.
Whether you're serving a crowd or treating yourself to a special meal, this adobong tuyo delivers restaurant-quality results with minimal effort. The secret is patience—letting the flavors develop slowly for maximum depth. Here's how to make it perfectly every time.
Ingredients for adobong tuyo pork
Pork belly, soy sauce, and vinegar create the perfect smoky-sweet harmony for crispy bites.
| Ingredient | Amount | Notes |
|---|---|---|
| Pork Belly 🥓 | 2 lb | Skin-on, cut into 1-inch cubes |
| Soy Sauce 🍶 | ½ cup | High-quality, preferably Japanese |
| Cane Vinegar 🍶 | ¼ cup | White or apple cider vinegar |
| Garlic Cloves 🧄 | 8 cloves | Minced, fresh preferred |
| Brown Sugar 🍚 | ¼ cup | Packed, light or dark |
| Black Peppercorns 🌶️ | 1 tbsp | Crushed, freshly ground |
| Bay Leaves 🌿 | 2 whole | Dried, standard size |
| Onion 🧅 | 1 whole | Yellow, sliced |
| Olive Oil 🫒 | 2 tbsp | Extra-virgin for searing |
| Salt 🧂 | 1 ½ tsp | Kosher or sea salt |
| Water 💧 | 1 cup | For braising liquid |
| Green Onions 🧅 | 3 whole | Sliced, for garnish |
| Fresh Chili Peppers 🌶️ | 2 whole | Sliced, optional for heat |
The pork belly is non-negotiable here—skin-on gives that signature crispy texture. Grab the thick-cut pieces from Asian markets or the meat section at Whole Foods; they usually carry it pre-cut. If you're buying a whole piece, ask for it to be cubed yourself. The skin should be thick and unbroken. For the soy sauce, Japanese brands like Kikkoman or Lee Kum Kee add depth, but any good-quality soy will work. The vinegar? Cane vinegar is traditional, but apple cider vinegar adds a fruity twist if you prefer.
No cane vinegar? White vinegar or rice vinegar will do in a pinch—just add a pinch of sugar to balance the sharpness. Fresh garlic is ideal, but garlic powder at half the amount works if you're short on time. For the brown sugar, muscovado sugar gives a deeper caramel note, but regular brown sugar is fine. The black peppercorns? Toast them lightly in a dry pan first—it brings out their aroma. If you're avoiding heat, skip the chili peppers entirely; the dish still shines without them.
The pork cubes keep best in the fridge for 3 days before cooking, but the sauce can be prepped ahead and stored for 1 week. For extra crispiness, freeze the cooked pork for 1 hour before searing—it crisps up like magic. Garnish with green onions right before serving, or they'll wilt. This dish reheats beautifully, so make extra for leftovers—it tastes even better the next day as the flavors meld.
Why You'll Love This Recipe
- One-Pot Magic: I swear by this recipe when I’m too tired to scrub pots—just dump everything in one pan, let the vinegar and soy sauce work their magic, and walk away. The pork belly renders its own fat, so you don’t even need to baste.
- Sweet-Sour Crunch: That balance of caramelized brown sugar and tangy cane vinegar? It’s like a flavor explosion in your mouth. The garlic cloves get crispy at the edges, adding a little bite that makes every bite irresistible.
- Lunchbox Hero: Between us, this is my secret for stress-free lunches. Cook a big batch on Sunday, and those leftovers taste just as good cold the next day—perfect for work lunches or kids’ school meals (yes, even my picky eater devours this).
- Budget Stretch: Pork belly might sound fancy, but it’s actually one of the most economical cuts when you render the fat yourself. A single panful feeds four for under $15, and the leftovers reheat like a dream—no soggy textures here.
Step-by-step instructions for adobong tuyo pork
Here's how to transform simple pork belly into restaurant-worthy crispy bites with a smoky, tangy sauce.
Sear the Pork Belly for Maximum Crispiness
Heat a large skillet over medium-high heat and add the 2 tablespoons olive oil. Once the oil shimmers but doesn't smoke, add the 2 lb pork belly cubes in a single layer. Let them sit undisturbed for 3-4 minutes until they develop a deep golden crust on one side.
Here's the thing—don't move them around yet. You want that fat to render and create a rich, flavorful crust. Once the bottoms are golden brown, gently flip each piece and sear the other side for another 3-4 minutes. Remove the pork from the skillet and set aside on a plate. You'll notice the pork releases easily when it's ready to flip—that's your signal to move them.
Build the Flavorful Braising Liquid
In the same skillet (don't clean it—the browned bits are pure flavor), add the 1 whole sliced onion and cook for 3-4 minutes until softened and slightly caramelized. Add the 8 minced garlic cloves and cook for 30 seconds until fragrant—don't let it burn, or it'll turn bitter.
Pour in the 0.5 cup soy sauce and 0.25 cup cane vinegar, scraping up all those delicious browned bits from the bottom of the pan. Add the 0.25 cup packed brown sugar, 1 tablespoon crushed black peppercorns, 2 whole bay leaves, 1.5 teaspoons salt, and 1 cup water. Bring this mixture to a gentle simmer over medium heat.
Braise Until Tender and Sauce Reduces
Return the seared pork belly to the skillet, spooning the braising liquid over the top to coat completely. Reduce the heat to low and cover with a tight-fitting lid. Let it simmer gently for 1 hour to 1 hour 15 minutes, turning the pork occasionally, until the meat is fork-tender and easily pulls apart.
Here's where the magic happens: the pork should be so tender that a fork slides in with minimal resistance. If the sauce reduces too quickly and becomes too thick, add 1-2 tablespoons of water to maintain the right consistency. The sauce should coat the back of a spoon but still be saucy enough to coat the pork beautifully.
Finish and Garnish for Perfect Presentation
Once the pork is tender, increase the heat to medium-high and let the sauce reduce further for 5-7 minutes until it thickens slightly and becomes glossy. Remove the bay leaves as they've done their job. Taste the sauce and adjust seasoning if needed—you might want to add a bit more soy sauce for saltiness or a touch more vinegar for tang.
Garnish each serving with 3 sliced green onions and 2 sliced fresh chili peppers for a pop of color and optional heat. The pork should be fork-tender with crispy edges and a glossy, smoky sauce clinging to every bite. Serve immediately with steamed rice to soak up all that delicious sauce.
Pro Tips For Making Adobong Tuyo Pork
- CRISP THE BELLY FIRST: Skip the raw pork belly straight into the adobo—after browning it in a hot pan with a splash of oil for 5-6 minutes per side. The Maillard reaction here deepens the flavor and keeps the meat from turning mushy when it braises. (Yes, even if you’re impatient like me.)
- USE AGED VINEGAR ONLY: Cane vinegar loses its punch over time, so grab the dark, aged kind (like kanin vinegar if you can find it). It’s pricier, but the tang cuts through the sweetness and soy sauce better than cheap white vinegar ever will. I learned this the hard way after making adobo that tasted flat.
- DON’T BOIL THE GARLIC: Crush those garlic cloves lightly—just enough to bruise them—before adding them to the pot. If you chop them fine or let them fry too long, they’ll burn and turn bitter. Toss them in whole or barely crushed, then let them simmer gently for 5 minutes max.
- SIMMER LOW AND LONG: After the initial sear, reduce heat to lowest possible and let the pork belly cook covered for at least 2 hours. Skim the foam off the surface every 30 minutes—this keeps the sauce clear and prevents a murky, greasy finish. (Your future self will thank you.)
Health benefits of this dish
Protein Powerhouse
This dish delivers a substantial 25 grams of protein per serving from the pork belly, making it an excellent choice for muscle repair and satiety. The high protein content helps stabilize blood sugar levels, keeping you full for hours after eating.
I've found that this makes it perfect for meal prep—just portion the leftovers into airtight containers and grab them for lunch. 💪
Rich in B Vitamins
The pork belly provides essential B vitamins, particularly B12 and niacin, which support energy metabolism and nervous system function. These vitamins are crucial for converting food into energy, which is why I always recommend this dish for busy days when you need a flavorful yet energizing meal.
The soy sauce adds an extra boost of B vitamins too.
Healthy Fats Balance
While pork belly contains saturated fats, the cooking method actually helps create a more balanced fat profile. The crispy skin provides monounsaturated fats that support heart health when consumed in moderation.
I like to serve this with steamed rice and plenty of vegetables to create a well-rounded meal that balances the rich pork flavors with lighter components.
Antioxidant Boost
The vinegar and garlic in this recipe provide powerful antioxidants that combat oxidative stress in your body. Garlic contains allicin, which has been shown to support cardiovascular health, while vinegar helps regulate blood sugar levels.
Together, they create a flavor profile that's as beneficial for your body as it is delicious for your palate. 🌿
Low-Calorie Option
For those watching calories, you can reduce the portion size to ½ cup per serving while keeping all the flavor. The sauce becomes the star—packed with umami from soy and tang from vinegar—so you're not sacrificing taste.
I often serve this with a side of steamed vegetables to create a satisfying, lower-calorie meal that still feels indulgent. The crispy texture makes it feel like a treat!
Gut-Friendly Benefits
The fermentation process in soy sauce and the probiotic benefits of vinegar make this dish surprisingly good for gut health. The combination supports beneficial gut bacteria, which is why I always recommend having a small portion with fermented foods like kimchi or sauerkraut for an extra digestive boost.
Trust me, your gut will thank you after a meal like this. 💛
Nutrition facts
Frequently asked questions
What makes this adobong tuyo recipe different from regular adobo?
This recipe focuses on crispy pork belly cubes rather than traditional adobo's tender meat. The key difference is the dual cooking method: first braising until tender, then searing to achieve that signature crispy texture. Regular adobo typically uses chicken or pork cuts that stay tender throughout, while this version embraces the contrast of crispy exterior and tender interior.
Can I substitute pork belly with another cut?
While pork belly gives the best crispy texture, you can use pork shoulder or pork ribs in a pinch. For ribs, cut them into 1-inch cubes and increase braising time to 1 hour 30 minutes. The skin is essential for crispiness, so if using boneless cuts, look for ones with a good fat cap. Never use lean cuts like tenderloin—they won't develop the same satisfying texture.
How do I prevent the sauce from becoming too sour?
The sauce should balance tangy and sweet flavors. If it tastes too acidic, add 1 teaspoon brown sugar or a splash of soy sauce to mellow it out. For extra depth, stir in ½ teaspoon fish sauce (a Filipino pantry staple) or a pinch of sugar. The key is to taste as you go—adjust gradually rather than all at once. The sauce should coat the pork beautifully without overpowering it.
Can I make this recipe in a slow cooker?
Sear the pork first as directed, then transfer everything (including the browned bits) to a slow cooker. Cook on low for 6-7 hours or high for 3-4 hours, then finish by searing the pork in a skillet to achieve crispiness. The slow cooker method works well for hands-off preparation, though you'll lose some of the caramelization from the stovetop finish.
What's the best way to reheat leftovers?
Reheat in a skillet over medium heat with 1 tablespoon oil to restore crispiness, or cover with foil and warm in a 350°F oven for 15-20 minutes. For extra crispiness, broil for 2-3 minutes at the end. Avoid microwaving—it makes the pork rubbery. The flavor actually improves overnight as the sauce continues to meld with the pork.