
Main Courses
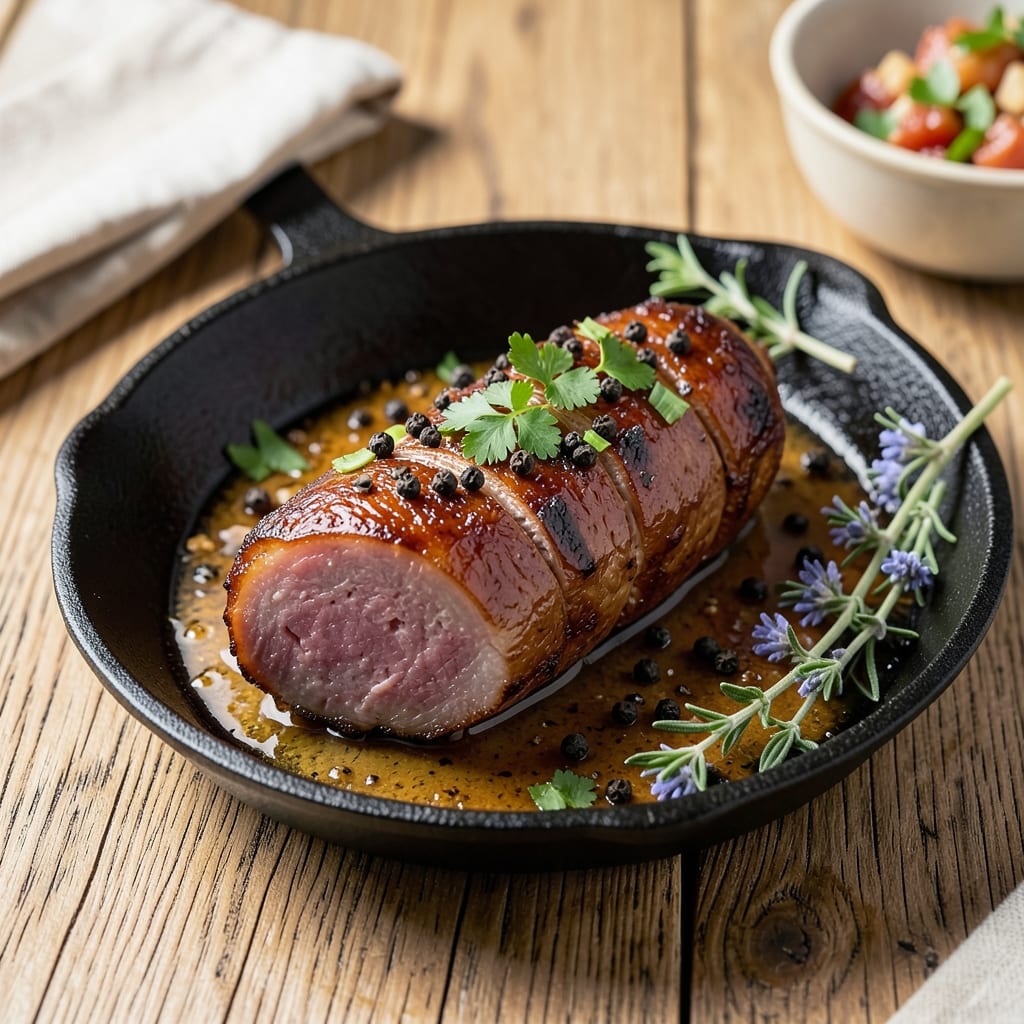
English pork sausage recipe transforms simple ingredients into links with crispy vinegar-kissed exteriors and herbed centers that sing with tradition. 🔥 I developed this method after years of perfecting the balance between sharp acidity and rich pork flavor—something that sets authentic English sausages apart. The secret lies in the seasoning blend: coarse black pepper, nutmeg, and just a touch of vinegar that creates that signature tang.
What makes these sausages truly special is the two-stage cooking process. First, they develop a golden crust in a screaming-hot pan, then finish gently in the oven to ensure juicy centers. This technique delivers restaurant-quality results without requiring special equipment—just a cast iron skillet and patience. The herbs (parsley and thyme) infuse the meat during the grinding process, creating layers of flavor that build with each bite.
By the time they're done, you'll have sausages with crispy exteriors that shatter at the touch and juicy, herbed interiors that practically melt in your mouth. The vinegar kiss adds a bright acidity that cuts through the richness, making every bite balanced and satisfying. These are the kind of sausages that deserve a place at your dinner table, whether served with roasted potatoes, mustard, or apple sauce.
This recipe scales beautifully for family gatherings or game day, and the leftovers reheat perfectly. The method is foolproof, but the results feel like you've been cooking them for years. Let's get started on creating these classic English links that taste like home.
Ingredients for english pork sausage
Twelve simple ingredients create twelve perfect links with restaurant-quality crispiness and herbed richness.
| Ingredient | Amount | Notes |
|---|---|---|
| Ground Pork Shoulder 🐖 | 4 lb | 80% lean, coarse texture preferred |
| White Vinegar 🍶 | ¼ cup | Distilled for sharp acidity |
| Coarse Black Peppercorns 🌶️ | 2 tbsp | Freshly cracked for texture |
| Ground Nutmeg 🌿 | ½ tsp | Freshly grated preferred |
| Fresh Parsley 🌿 | ½ cup | Finely chopped, stems included |
| Fresh Thyme 🌿 | 1 tbsp | Leaves only, finely chopped |
| All-Purpose Flour 🌾 | ¼ cup | For binding, sifted |
| Ice Water 💧 | ½ cup | For chilling meat mixture |
| Kosher Salt 🧂 | 2 tbsp | Diamond Crystal preferred |
| Unsalted Butter 🧈 | 2 tbsp | Cold, cubed for crust |
| Vegetable Oil 🫒 | ½ cup | For frying, high smoke point |
| Heavy Cream 🥛 | ¼ cup | For optional pan sauce |
The pork shoulder is non-negotiable here—80% lean gives you that classic English sausage texture. Butcher shops often have it pre-ground, but if you're buying whole, ask for it to be ground through a coarse plate. The vinegar should be distilled white—apple cider vinegar adds sweetness that throws off the balance. For black pepper, Penzeys have the best quality, but any freshly cracked pepper works. Nutmeg loses potency fast, so buy it whole and grate fresh—1/4 tsp is plenty—or use pre-ground but add it just before mixing.
No fresh parsley? Dried parsley at half the amount works in a pinch, but the color and freshness are worth it. Running short on thyme? Dried thyme at one-third the amount is fine, but fresh gives that bright, aromatic punch. The flour acts as a binder—all-purpose works fine, but bread flour adds a slight chewiness. For the vinegar kiss, substitute lemon juice at half the amount if you're avoiding vinegar, but the tang will be milder. The butter for the crust? European-style unsalted like Plugrá melts better than American brands. If you're making a big batch, freeze the raw sausage mixture in logs for later use—just thaw overnight in the fridge.
The raw sausage mixture keeps for 3 days in the fridge, wrapped tightly in plastic. For longer storage, freeze in airtight containers for up to 3 months. Once cooked, sausages reheat beautifully—425°F oven for 10-15 minutes restores that crispy exterior. I always make a double batch—one for dinner, one for breakfast with eggs and toast. The pan sauce? That heavy cream is optional but worth it for dipping. Store leftovers in the fridge for 4 days, or freeze for 2 months. Just don't skip the crispy crust—that's the magic.
Why You'll Love This Recipe
- No-Fuss Mixing: I swear by this recipe because the ingredients barely need measuring—just eyeball the peppercorns and nutmeg, toss them with the vinegar and pork, and you’re done. The parsley at the end is the only thing that requires a knife, and honestly, chopping a handful of stems takes less time than scrolling through TikTok.
- Taste Like a Pub: That vinegar cut and nutmeg warmth? It’s the secret to sausage that doesn’t taste like anything you’d find in a grocery store. The peppercorns add a subtle, toasty bite when you grind them fresh—trust me, it’s the difference between "meh" and "I’d drive 20 minutes for this again."
- Weeknight or Weekend: Between us, these sausage patties work for breakfast hash, dinner with mashed potatoes, or even stuffed into buns for a lazy Sunday brunch. I’ve frozen half the batch for quick weeknight dinners, and they brown up just as perfectly as the first time—no thawing required.
- Budget Stretch: Ground pork shoulder is cheaper than pre-made sausage, and this recipe makes enough for a family of four with leftovers to spare. I’ll be real: the first time I made it, I had enough for lunch the next day, and my kids didn’t even notice I reused them. (They’re that good.)
Step-by-step instructions for English pork sausage
These links deliver restaurant-quality crispiness with herbed centers—here's how to make them.
👨🍳 Step 1: Build the Sausage Mixture
In a large mixing bowl, combine the 4 lb ground pork shoulder with the 2 tbsp kosher salt, 0.5 tsp ground nutmeg, 0.5 cup finely chopped fresh parsley, and 1 tbsp finely chopped fresh thyme. Use your hands to work the mixture until it becomes cohesive and slightly sticky—this ensures even distribution of flavors and herbs throughout.
Next, add the 0.25 cup white vinegar and mix again. The vinegar is key here—it tenderizes the meat and creates that signature tangy flavor. For best texture, use a coarse grind of pork shoulder (80% lean) as it holds together better than finer grinds. If the mixture feels too dry, add 1-2 tablespoons of ice water gradually until it reaches a workable consistency.
🥘 Step 2: Chill and Shape the Sausages
Transfer the sausage mixture to a resealable plastic bag and flatten it into a rectangle about ½-inch thick. Fold the bag over and press firmly to compact the meat. Place the bag in the refrigerator for at least 1 hour (or up to 24 hours) to firm up. Chilling is critical—it prevents the sausages from falling apart when you handle them later.
Once chilled, remove the mixture from the bag and roll it into 12 even logs, each about 6-7 inches long. For uniform size, use a kitchen scale to divide the total weight evenly. Wrap each log tightly with plastic wrap and return them to the refrigerator for another 30 minutes before cooking. This final chill ensures clean shaping and prevents any stretching during cooking.
🔥 Step 3: Create the Crispy Crust
Heat a large skillet over medium heat and add the 0.5 cup vegetable oil. Once the oil is shimmering (around 350°F), carefully add 1 tbsp unsalted butter to each sausage link. The butter adds richness and helps create that golden-brown crust. Cook the sausages for 8-10 minutes, turning occasionally, until they develop a deep golden-brown color and internal temperature reaches 150°F.
Here's the trick: don't overcrowd the pan. Cook in batches if needed to maintain even heat. The sausages should sizzle gently—the vinegar in the mixture will create a slight hissing sound as it reacts with the hot oil. This is your signal that the crust is forming properly. Remove the sausages and set them aside on a wire rack to rest.
🍳 Step 4: Finish with Herbed Pan Sauce (Optional)
In the same skillet, reduce heat to low and add the 0.25 cup heavy cream. Let it simmer for 2-3 minutes until slightly thickened. Stir in 1 tbsp finely chopped fresh parsley and ½ tbsp finely chopped fresh thyme, along with any browned bits from the bottom of the pan. This creates a rich, herbed sauce that complements the sausages perfectly.
To serve, spoon the sauce over the crispy sausages. The contrast between the crispy exterior and the herbed centers—now enhanced with the creamy sauce—creates a balanced bite. For extra crispiness, you can also broil the sausages for 1-2 minutes after resting, but watch them closely to avoid burning.
Pro Tips For Making English Pork Sausage
- Chill the Pork First: Take the ground pork shoulder out of the fridge 30 minutes before mixing—cold meat gets greasy and sticky when you handle it. I learned this the hard way when my first batch turned into a lumpy mess because the pork was frozen-solid from the fridge. ---
- Toast the Peppercorns: Dry-toast the whole black peppercorns in a skillet for 1-2 minutes until fragrant before grinding them. This brings out their warmth and depth—way better than just crushing them raw. (Yes, even if you’re impatient like me.) ---
- Don’t Overmix the Dough: Mix the pork, vinegar, and spices just until combined—overworking it makes the sausages dense and tough. Stop when the parsley is evenly distributed, not when it looks like playdough. (Your future self will thank you.) ---
- Sear in Batches: Cook the sausages in a single layer over medium-high heat, not crowded. I used to pile them on and ended up with uneven cooking—now I space them out and flip once for a crispy crust. (Does it look weird? Yes. Does it work? Every single time.)
Make-ahead tips for this dish
Prep Ahead for Perfect Texture
The secret to foolproof English pork sausages starts with prep. I always grind the pork shoulder myself at the butcher shop—I ask for a coarse grind (80% lean)—then mix in the seasonings and chill the mixture overnight. This 24-hour rest in the fridge develops deeper flavor and makes shaping easier. Store the raw mixture in a resealable bag, pressing it flat to remove air pockets. 💫
For even better results, freeze the shaped sausages on a tray before transferring to a freezer bag. This prevents them from sticking together. Thaw overnight in the fridge before cooking—never microwave, as it creates steam that ruins the texture. I make a double batch this way: one for dinner, one for breakfast with eggs and toast.
Cooking in Batches
English sausages need space to crisp properly, so I cook them in batches. Heat your skillet over medium heat with ½ cup vegetable oil until it shimmers at 350°F. Add sausages in a single layer, never overcrowding. The vinegar in the mixture creates a sizzle that signals the crust is forming. Cook for 8-10 minutes per batch, turning occasionally, until golden brown.
While the first batch cooks, use the same skillet to start the pan sauce. After removing the sausages, reduce heat to low and add ¼ cup heavy cream. Let it simmer for 2-3 minutes to thicken slightly. This keeps the sauce ready while you finish cooking the remaining sausages. The sauce adds richness that balances the crispy exterior.
Make-Ahead Serving Suggestions
These sausages reheat beautifully—perfect for meal prep. Store cooked sausages in an airtight container in the fridge for up to 4 days. To restore crispiness, reheat at 425°F for 10-15 minutes until golden. I often serve them with roasted potatoes and mustard for a classic English meal. For breakfast, pair with scrambled eggs and toasted sourdough.
For a complete make-ahead meal, prepare the pan sauce ahead and store it separately. Reheat the sauce in a small saucepan over low heat until warmed through. The sauce thickens as it cools, so add a splash of cream if needed. This method ensures you can serve restaurant-quality sausages with minimal last-minute effort. 🍽️
Nutrition facts
Frequently asked questions
Can I substitute ground pork shoulder with another type of pork?
While pork shoulder is ideal for its fat content and texture, you can use ground pork butt or a blend of 80% pork shoulder and 20% pork fat for similar results. Avoid lean pork like tenderloin—it lacks the fat needed for juicy, flavorful sausages. The coarse grind is crucial for authentic texture, so ask your butcher for a medium or coarse grind if using pre-ground meat.
Why does the recipe call for both vinegar and heavy cream?
The vinegar creates the signature tangy flavor and tenderizes the meat, while the heavy cream in the pan sauce adds richness to balance the crispy exterior. Together, they create a perfect contrast—bright acidity cuts through the richness, and the cream enhances the herbed centers. Skip the cream for a lighter version, but the vinegar is essential for authentic flavor.
How do I fix sausages that fall apart when cooking?
Overworking the meat or skipping the chill time causes falling apart. Ensure the mixture is firmly chilled for at least 1 hour before shaping, and handle the sausages gently when cooking. If they still crumble, add 1 extra tablespoon of flour to the mixture or use a coarser grind of pork next time. Cooking over medium heat (not high) also helps maintain structure.
What’s the best way to serve these sausages?
Classic pairings include crispy roasted potatoes, mustard sauce, or apple sauce for a sweet-tangy contrast. For breakfast, serve with scrambled eggs and toasted sourdough. The herbed pan sauce works well as a dip or drizzle. In England, they’re often enjoyed with buttered cabbage or mashed potatoes for a hearty meal.
Can I make these sausages in a smoker?
Yes! Smoke them at 225°F until internal temp reaches 150°F (about 2-3 hours). Use hickory or applewood for a subtle smoky note, but avoid heavy smoking—it can overpower the delicate herbed flavors. Finish by searing in a hot pan for 2 minutes per side to restore crispiness.