
Main Courses
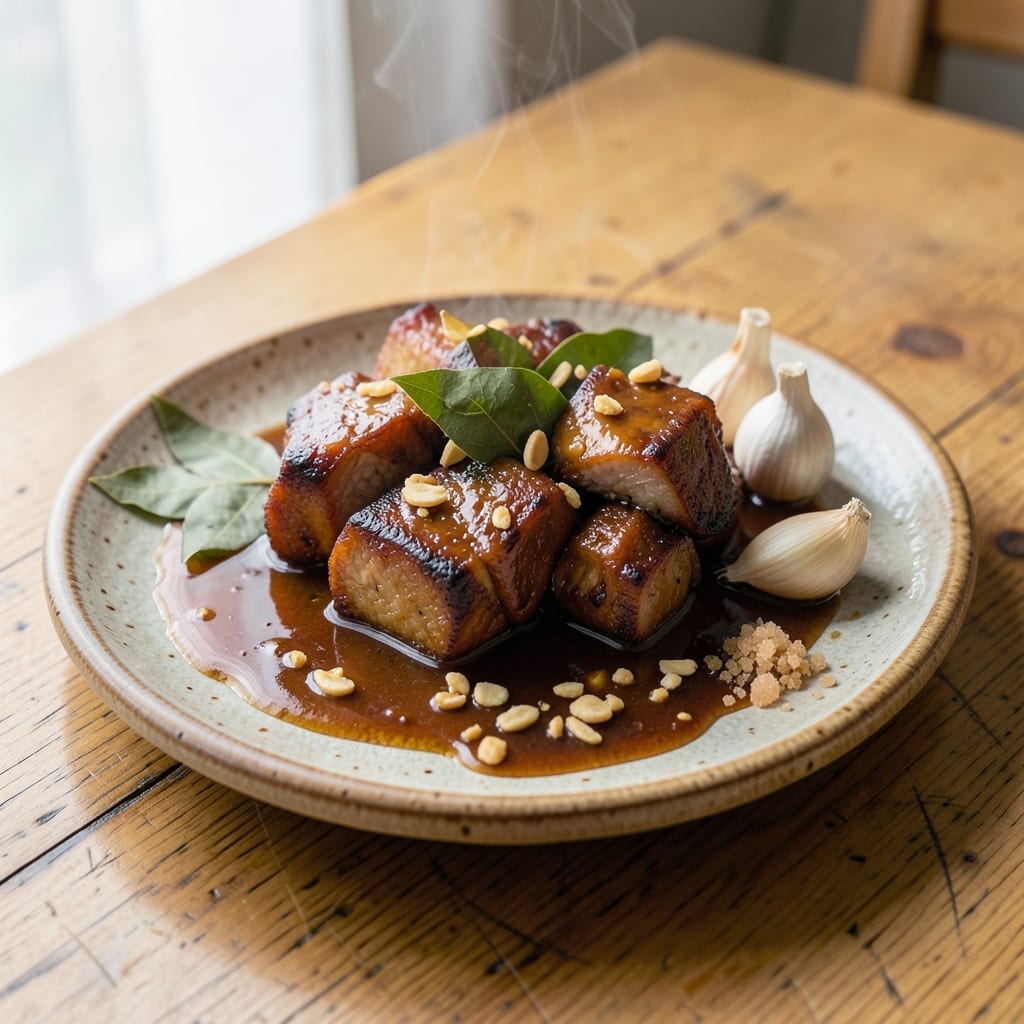
This Filipino pork adobo recipe transforms tough pork into tender, fall-apart perfection using your Instant Pot—no long simmering required. The magic happens when vinegar and soy sauce work together in high-pressure steam, creating that signature tangy-savory balance my grandmother’s recipe cards always promised. I’ve adapted her method to modern kitchens, keeping the soul of the dish while cutting prep time dramatically.
The Instant Pot’s pressure cooker function does the heavy lifting, breaking down the meat in just 20 minutes while developing a rich, glossy sauce that clings to every bite. No need for fancy techniques—just a few simple ingredients (garlic, vinegar, soy sauce) and one crucial step: deglazing the pot after cooking to capture all those flavorful browned bits. This is the kind of recipe that delivers restaurant-quality results without the hours in the kitchen.
By the time you’re done, you’ll have succulent pork pieces swimming in a glossy sauce that’s equally good poured over steamed rice or drizzled over noodles. The sauce reduces beautifully, concentrating those bright vinegar notes and deep umami flavors. It’s the perfect balance of tangy, savory, and slightly sweet—exactly how adobo should taste, with none of the guesswork.
Serve this with fluffy jasmine rice to soak up every last drop of that flavorful sauce, or try it over garlic fried rice for extra texture. The leftovers? Even better the next day as the flavors meld further. Let’s make this dish that brings a taste of home to your table in less time than you’d spend waiting for takeout.
Ingredients for filipino pork adobo recipe instant pot
Pork, vinegar, soy sauce, and garlic—simple ingredients that transform into restaurant-quality adobo.
| Ingredient | Amount | Notes |
|---|---|---|
| Boneless Pork Shoulder 🥩 | 1 ½ lb | Cut into 1-inch chunks |
| White Vinegar 🍶 | ½ cup | Distilled preferred |
| Soy Sauce 🍶 | ½ cup | Low-sodium preferred |
| Garlic Cloves 🧄 | 6 cloves | Minced for even cooking |
| Brown Sugar 🍯 | ¼ cup | Light or dark |
| Bay Leaves 🌿 | 2 whole | Dried works fine |
| Black Peppercorns 🌶️ | 10 whole | Crushed lightly |
| Olive Oil 🫒 | 1 tbsp | For searing |
| Jasmine Rice 🌾 | 1 ½ cups | Uncooked, for serving |
| Water 💧 | 1 ½ cups | For rice cooking |
| Salt 🧂 | 1 tsp | Kosher or sea salt |
| Green Onions 🧅 | 3 whole | Sliced for garnish |
The pork shoulder is the star here, and bone-in cuts actually work better for flavor, but boneless is fine if that's what you've got. Filipino markets often carry pre-cut pork shoulder, but regular grocery stores work too—just ask the butcher to cut it into 1-inch chunks. Look for meat with good marbling; that's where the flavor hides. If you're feeling fancy, Costco's pork shoulder is my go-to for big batches. The vinegar is non-negotiable—distilled white gives you that clean tang, while apple cider vinegar adds subtle sweetness (use it if you prefer). For the garlic, freshly minced is worth the 30 seconds—pre-minced garlic lacks punch.
No white vinegar? Canola vinegar or apple cider vinegar work in a pinch, though the flavor will differ slightly. Low-sodium soy sauce is ideal, but regular soy sauce works if that's what you've got—just reduce the salt later. The brown sugar balances the acidity, so don't skip it. Coconut sugar works too if you're watching refined sugar. For the bay leaves, dried is fine, but fresh adds a brighter aroma. The black peppercorns should be crushed lightly—just enough to release their flavor without turning into dust. If you're short on time, pre-minced garlic from a jar is better than nothing, but fresh is always superior.
This sauce gets better with time, so make extra—it reheats beautifully. Store leftovers in airtight containers in the fridge for up to 5 days, or freeze for 3 months. The rice? Cook it separately so it doesn’t get soggy from the sauce. Garnish with those green onions right before serving—they add a fresh pop of color and crunch. Pro tip: Deglaze that Instant Pot after cooking with a splash of water to scrape up all the browned bits—those are flavor gold.
Why You'll Love This Recipe
- Press-Button Magic: I swear by this—dump the pork, add the vinegar and soy, set the timer, and walk away. No babysitting, no stirring every five minutes. The Instant Pot does all the work while you drink your coffee or scroll through memes.
- Tangy-Sweet Perfection: That balance of vinegar’s sharp bite and brown sugar’s caramelized richness? It’s ridiculously good. The garlic cloves soften just enough to melt in your mouth, and the pork? So tender it falls apart at the touch of a fork.
- Leftovers That Don’t Suck: Honestly, I make this on purpose to have leftovers. Cold adobo over rice the next day? Even better. Pack it for lunch, freeze portions for lazy nights, or serve it to guests who’ll think you slaved over it. (Between us, they’ll never know.)
- Budget Meal, Crowd Pleaser: Pork shoulder’s cheap, and a few cloves of garlic stretch far. This feeds six for under $15, and everyone—your picky teen, your meat-loving dad, even your veggie-curious friend—will eat it. No complaints, just empty plates.
Step-by-step instructions for Filipino pork adobo
Here's how to create restaurant-quality adobo with melt-in-your-mouth pork in record time.
Sear the Pork Shoulder for Maximum Flavor
Cut the 1.5 lb boneless pork shoulder into 1-inch chunks and pat them dry with paper towels. Heat 1 tablespoon olive oil in a large skillet over medium-high heat until shimmering. Working in batches if needed, add the pork and sear for 3-4 minutes per side until deeply golden brown.
This initial searing builds a flavorful crust that won't dissolve in the vinegar later. You'll know it's ready when the edges turn a rich caramel color and the pork releases easily from the pan. Transfer the seared pork to the Instant Pot and set aside.
Sauté Aromatics and Build the Adobo Base
In the same skillet (no need to clean it—the browned bits add flavor), add the 6 cloves minced garlic and cook for 30 seconds until fragrant. Immediately pour in the 0.5 cup white vinegar and scrape up all the browned bits from the bottom of the pan. This deglazing captures all that caramelized flavor.
Add the 0.5 cup soy sauce, 0.25 cup brown sugar, 2 whole bay leaves, and 10 lightly crushed black peppercorns to the skillet. Stir to combine, then pour this aromatic mixture over the seared pork in the Instant Pot. The vinegar will sizzle vigorously—this is normal and indicates the acid is working to tenderize the meat.
Pressure Cook to Perfect Tenderness
Secure the Instant Pot lid and set the valve to sealing. Select the high pressure setting and cook for 25 minutes. The Instant Pot will automatically switch to keep warm mode when done, which is perfect for letting the flavors meld.
Here's the thing—don't rush this step. The high pressure and acidic marinade work together to transform tough pork into fork-tender slices. When the cooking cycle completes, let the pressure release naturally for 10 minutes before quick-releasing any remaining pressure. This gradual release prevents the meat from becoming mushy.
Finish with Jasmine Rice and Garnish
While the pork rests, rinse the 1.5 cups jasmine rice under cold water to remove excess starch. In the Instant Pot, combine the rice with 1.5 cups water and the 1 teaspoon salt. Stir gently and place the trivet (or a heat-resistant rack) over the rice.
Return the pork and all its delicious sauce to the Instant Pot, arranging the chunks over the rice. Secure the lid and cook on high pressure for 4 minutes. When done, let the pressure release naturally for 5 minutes before opening. The rice should be perfectly fluffy, and the pork should be so tender it nearly falls apart at the touch.
Serve with Fresh Green Onions
Carefully transfer the rice and pork to serving plates, ensuring each portion gets its share of the tangy sauce. Garnish each serving with sliced green onions for a fresh contrast to the rich, savory pork. The adobo sauce should coat every bite—if it's too thick, stir in 1-2 tablespoons of water to loosen it.
This dish tastes even better the next day as the flavors deepen. The pork should be fork-tender with just a slight bite, perfectly balanced by the sweet-tangy adobo sauce. Serve with extra rice if needed—this recipe always disappears quickly!
Pro Tips For Making Filipino Pork Adobo Recipe Instant Pot
- CRUSH THE GARLIC: I learned this the hard way—peeling and mincing garlic cloves by hand in the Instant Pot is a waste of time. Use 6-8 whole cloves, smash them flat with the side of your knife, and let the pressure do the work. The skins soften and release flavor without extra effort.
- SALT THE PORK FIRST: Skip the Instant Pot step and season the pork shoulder with 1 teaspoon salt before adding liquids. It penetrates deeper, and the meat stays juicier when the vinegar and soy sauce hit later. Trust me, the difference in tenderness is noticeable.
- SIP THE VINEGAR: Don’t dump the full ½ cup of white vinegar at once—start with ¼ cup, cook for 10 minutes, then add the rest. The sudden acidity can toughen the pork if it all hits at once. This keeps the meat tender while still giving that classic tang.
- BROWN THE PORK: Take 2 minutes to sear the pork shoulder in a dry skillet before transferring it to the Instant Pot. The Maillard reaction adds depth the sauce can’t match on its own. (Yes, even if you’re impatient like me—just do it.)
Common mistakes when making this recipe
Skipping the Sear
I learned this the hard way—skipping the initial sear means missing out on that crucial Maillard reaction that builds deep, caramelized flavor. The pork will still cook, but it’ll taste bland compared to properly seared pieces. Reserve 1 tablespoon olive oil in a skillet and sear the pork until golden brown before adding it to the Instant Pot. This step takes just 5-10 minutes but makes a world of difference. 🔥
Wrong Vinegar Choice
Not all vinegars are created equal! Using apple cider vinegar or balsamic vinegar instead of distilled white vinegar changes the flavor profile dramatically. White vinegar provides that clean, sharp tang that’s essential for authentic adobo. If you must substitute, use canola vinegar—it’s milder but still works in a pinch. The sauce will taste different, but it’ll still be delicious.
Overloading the Pot
Crowding the Instant Pot leads to uneven cooking and soggy pork. The 1.5 lb pork shoulder should fit comfortably with room to move—don’t double the recipe unless your pot is at least 6-quart size. If you’re cooking for more people, divide the pork into batches or use a larger Instant Pot. Overfilling also risks releasing excess steam during pressure cooking, which can cause messy spills.
Ignoring Natural Release
Quick-releasing the pressure right after cooking can turn your tender pork into mush. Always let the pressure release naturally for 10 minutes before manually releasing any remaining pressure. This gradual release helps the meat retain its texture while allowing the flavors to meld. Trust me, your grandma’s recipe cards never skipped this step—and neither should you. ⏰
Underestimating the Sauce
The adobo sauce is just as important as the pork! Many home cooks pour the sauce over the rice and forget about it, but that’s where the magic happens. Always deglaze the skillet after sautéing the aromatics to capture all those flavorful browned bits. Then, reduce the sauce by simmering it for an extra 2-3 minutes on the stovetop if it’s too thin. A properly reduced sauce clings beautifully to the pork and rice.
Using Pre-Minced Garlic
Freshly minced garlic is non-negotiable for authentic flavor. Pre-minced garlic lacks the aromatic punch and often contains anti-caking agents that dull the taste. Spend the 30 seconds it takes to mince your own—it makes a noticeable difference. If you’re in a rush, at least use fresh whole cloves** and crush them lightly in a garlic press. Your taste buds (and your grandma’s recipe cards) will thank you. 🧄
Nutrition facts
Frequently asked questions
Can I use chicken or shrimp instead of pork?
This recipe works beautifully with chicken thighs (use 20 minutes pressure cook time) or shrimp (just 2 minutes after pressure cooking). For shrimp, add them during the last 2 minutes of cooking to avoid overcooking. The sauce will still develop the same tangy-savory profile, though cooking times vary based on protein type.
What if I don't have an Instant Pot?
No problem! You can make this in a slow cooker (cook on low for 6-8 hours) or on the stovetop (simmer covered for 1.5 hours). The key is low-and-slow cooking to tenderize the meat. For stovetop, deglaze the pan after browning and reduce the sauce longer to concentrate the flavors. The Instant Pot just cuts the time dramatically.
Why does my sauce look too thin?
That's normal during cooking! After pressure cooking, transfer the pork and sauce to a skillet and simmer uncovered for 3-5 minutes to reduce it. You can also add 1 tablespoon cornstarch mixed with water as a slurry to thicken it. The sauce should coat the back of a spoon but still be pourable. A properly reduced sauce clings beautifully to the pork.
Can I make this recipe gluten-free?
Yes! Simply substitute the soy sauce with tamari or coconut aminos (both are gluten-free). These alternatives provide the same umami depth while being safe for gluten-free diets. Just note that tamari has a slightly different flavor profile but works wonderfully in adobo. The rest of the recipe remains unchanged.
How do I store leftovers?
Store leftovers in airtight containers in the fridge for up to 5 days. The flavors actually improve overnight as the sauce melds with the pork. For longer storage, freeze for up to 3 months. Reheat gently on the stovetop with a splash of water to restore moisture. The sauce may thicken when cold, so stir in a little water when reheating.