
Main Courses
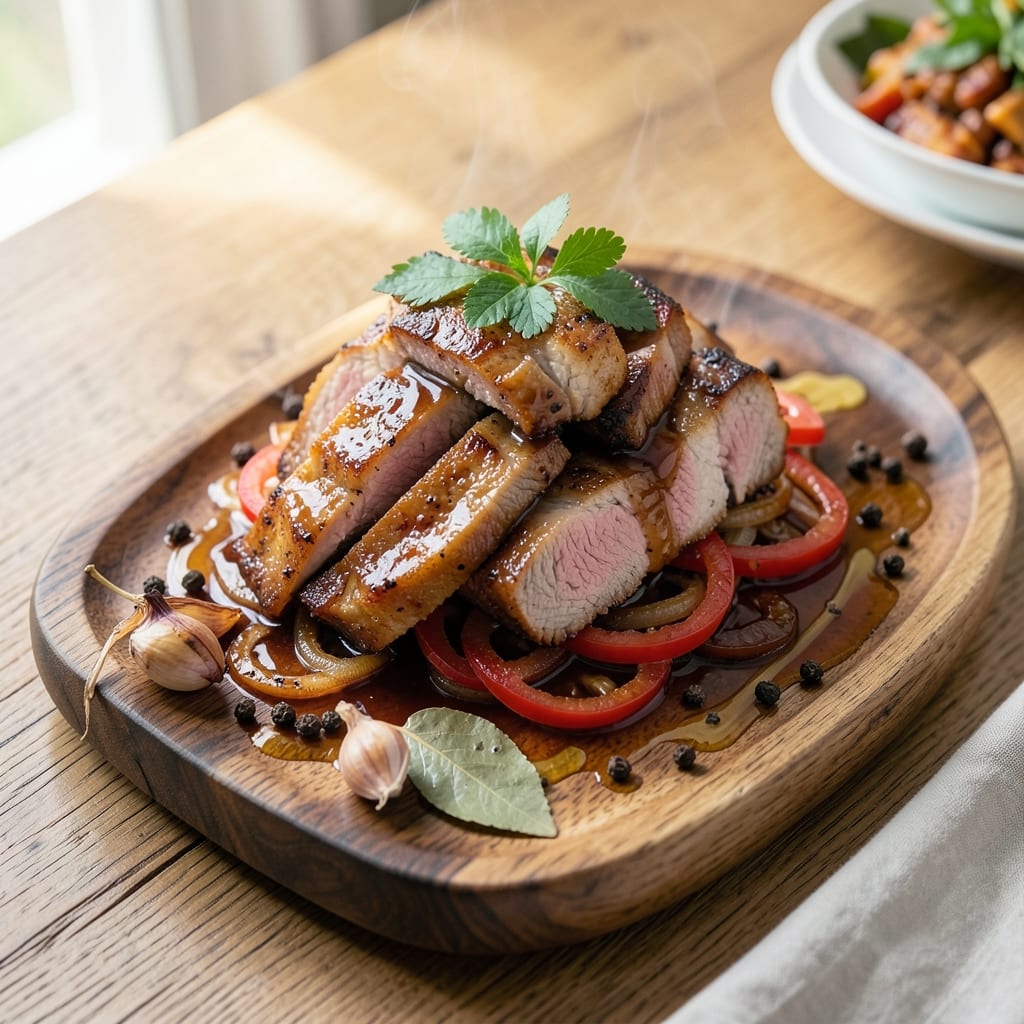
This Filipino pork liempo BBQ recipe brings the smoky, tangy essence of Filipino barbecue to your grill, transforming simple pork into a dish that's crispy on the outside and impossibly tender inside. 🔥 I first encountered this technique during my time in the Philippines, where whole cuts of pork are slow-smoked and basted with vinegar until the edges caramelize into a sweet, charred crust. The key lies in the balance of heat and acid—charcoal or wood fire for that authentic smokiness, paired with a vinegar glaze that keeps the meat juicy while creating that signature crunch.
The beauty of this recipe is in its simplicity: just a few ingredients—pork belly or shoulder, vinegar, sugar, and a touch of garlic—work together to create a dish that's both restaurant-worthy and perfect for a weeknight dinner. Unlike many BBQ recipes that rely on heavy marinades, liempo relies on the magic of slow cooking and basting. The result? A cut of pork that practically melts in your mouth while the exterior develops that irresistible charred texture that makes it impossible to stop eating.
What sets this recipe apart is the cultural technique of "liempo," where the pork is grilled or smoked over charcoal until the edges reach that perfect balance of crisp and caramelized. The vinegar glaze not only adds tang but also helps tenderize the meat, ensuring every bite is juicy and flavorful. This dish is traditionally served with steamed rice, atchara (pickled papaya), and a side of fresh vegetables to cut through the richness.
Whether you're hosting a gathering or simply craving a taste of the Philippines, this recipe delivers authentic flavors with minimal effort. The process is straightforward but requires patience—letting the pork cook low and slow until it reaches that ideal texture. Trust me, once you master this technique, you'll never go back to ordinary BBQ.
Ingredients for filipino pork liempo bbq
Four simple ingredients transform pork into restaurant-quality Filipino BBQ with crispy edges and tender centers.
| Ingredient | Amount | Notes |
|---|---|---|
| Pork Belly (or Shoulder) 🥓 | 2 ½ lb | Whole cut, skin-on preferred |
| White Vinegar 💧 | ½ cup | Distilled preferred for clarity |
| Granulated Sugar 🍚 | ¼ cup | White or brown sugar |
| Garlic Cloves 🧄 | 6 cloves | Minced, for basting |
| Bay Leaves 🌿 | 2 whole | Fresh or dried |
| Black Peppercorns 🌶️ | 1 tsp | Crushed, for seasoning |
| Salt 🧂 | 1 ½ tsp | Kosher or sea salt |
| Charcoal or Wood Chips 🔥 | 2 cups | For authentic smokiness |
| Olive Oil 🫒 | 2 tbsp | For oiling pork |
| Fresh Ginger 🌿 | 1 tbsp | Grated, optional for depth |
| Steamed White Rice 🍚 | 2 cups | For serving, cooked |
| Pickled Papaya (Atchara) 🍈 | ½ cup | Store-bought or homemade |
The pork cut is everything here. Pork belly delivers that signature crispy skin, but shoulder works too—just trim excess fat. Look for cuts with good marbling at Filipino markets or Asian grocery stores like 99 Ranch or H Mart, where they often carry pre-cut liempo pieces. If using a whole cut, score the fat cap in a crosshatch pattern before cooking—it renders beautifully and adds flavor. The vinegar should be distilled white for clarity, but apple cider vinegar adds subtle sweetness if you prefer. Bay leaves and peppercorns are non-negotiable for that authentic depth of flavor.
No charcoal? Hardwood chunks or soaked wood chips work in a smoker or grill. The sugar can be swapped for brown sugar or coconut sugar—it caramelizes differently but still delivers. Running out of bay leaves? Dried thyme at half the amount gives a similar earthy note. Fresh ginger is optional but worth it if you love its zing. For the basting glaze, garlic and vinegar are essential—don't skip them. The rice and atchara are traditional sides, but grilled veggies or a simple salad work just as well. If you're short on time, jarred atchara from the Asian aisle is a lifesaver.
Pork keeps best in the fridge for 3 days if wrapped tightly in parchment. For longer storage, freeze for up to 3 months—thaw overnight in the fridge before reheating. The basting glaze can be made ahead and stored in the fridge for 1 week. I always double the recipe and freeze half—perfect for lazy weeknights when you crave that smoky, tangy crunch without the effort. Reheat gently in a skillet to revive the crispy edges.
Why You'll Love This Recipe
- One-Pan Magic: I swear by this trick—just toss the pork, vinegar, and sugar in a single pot and let it simmer. No chopping, no fussing, no extra dishes. The vinegar does all the work while you sip your coffee.
- Sweet-Sour Crunch: That balance of caramelized sugar and tangy vinegar? It’s what makes this dish ridiculously good. The garlic and bay leaves add depth, but honestly, the pork belly’s crispy edges with that sticky glaze? Chef’s kiss every time.
- Leftovers That Save: This recipe actually tastes better the next day. I make a big batch on Sundays, and by Wednesday, it’s still the star of my lunch. Pack it for work, reheat it for dinner—it’s that reliable.
- Budget-Friendly Feast: Pork belly might sound fancy, but it’s cheaper than you think, especially if you use shoulder instead. A few cloves of garlic, a handful of sugar, and you’ve got a dish that feeds four for under $15. That’s a win.
Step-by-step instructions for Filipino pork liempo BBQ
Master this iconic Filipino dish with perfectly charred exterior and tender, flavorful pork.
🔥 Step 1: Prepare the Charcoal and Season the Pork
Soak the 2 cups charcoal or wood chips in water for 30 minutes to prevent burning. Meanwhile, rub the 2.5 lb pork belly (or shoulder) with 2 tbsp olive oil and massage it into the meat, especially the skin. This creates a barrier that helps the pork stay juicy during the long cook.
In a small bowl, mix 1.5 tsp salt, 1 tsp crushed black peppercorns, and 1 tbsp grated fresh ginger. Pat this seasoning blend all over the pork, pressing it into the meat. Let the pork sit at room temperature for 30 minutes—this ensures even cooking and better flavor penetration.
🍳 Step 2: Char the Pork Over Hot Charcoal
Drain the soaked charcoal and spread it evenly in a grill pan or on a grill grate. Light the charcoal and let it burn until covered with gray ash (about 10 minutes). Place the pork directly on the hot charcoal, skin-side down. Cover with a lid or foil to trap heat and smoke.
Char the pork for 15-20 minutes on the first side until the skin develops deep charred black spots and the fat begins to render. Flip the pork and repeat on the second side. This step is critical—it creates the signature smoky, caramelized crust that defines liempo. If the charcoal burns out before the pork is fully charred, add more soaked chips to maintain heat.
👨🍳 Step 3: Create the Vinegar-Garlic Marinade
While the pork chars, prepare the marinade by combining 0.5 cup white vinegar, 0.25 cup granulated sugar, 6 minced garlic cloves, and 2 whole bay leaves in a saucepan. Bring to a boil over medium heat, then reduce to a simmer for 5 minutes until the sugar dissolves and the mixture thickens slightly. Remove from heat and let it cool.
Strain the marinade to remove the bay leaves, then pour it into a shallow dish. Once the pork is charred on both sides, transfer it to the marinade, turning to coat evenly. Let it marinate for 10 minutes—this tenderizes the meat and infuses it with tangy, garlicky flavor. The vinegar will also help break down the fat for a silky texture.
🔥 Step 4: Slow-Cook and Baste the Pork
Preheat your oven to 300°F. Place the marinated pork on a baking sheet lined with foil, fat-side up. Bake for 2 hours, basting with the marinade every 30 minutes. The pork is done when it reaches an internal temperature of 195-203°F and the meat is fork-tender with no resistance.
Here’s the thing—don’t rush this step. The slow cook ensures the collagen in the pork melts into gelatin, creating that signature silky, pull-apart texture. If the marinade reduces too much, add a splash of water to keep it from drying out. The pork should have a glossy sheen and deep caramelization from the char and marinade.
🍽️ Step 5: Rest, Slice, and Serve
Remove the pork from the oven and let it rest for 15 minutes before slicing. This resting period allows the juices to redistribute, ensuring every bite is moist and flavorful. While it rests, reheat the marinade in a small saucepan over low heat until it thickens slightly—this will be your serving sauce.
Slice the pork against the grain into ½-inch thick pieces. Serve immediately over 2 cups steamed white rice, drizzled with the reduced marinade and topped with 0.5 cup pickled papaya (atchara). The contrast of the tangy, crunchy papaya with the rich, charred pork is what makes this dish unforgettable. Enjoy while warm for the best texture and flavor.
Pro Tips For Making Filipino Pork Liempo Bbq
- CRISP THE BELLY FIRST: If using pork belly, sear the fatty side down until the skin cracks and turns golden—this traps flavor and prevents soggy meat later. I used to skip this, thinking the braising would handle it, but the texture suffers without that initial render. ---
- BALANCE THE VINEGAR: Start with half the vinegar called for, then add more as you taste—too much upfront makes the pork taste sharp instead of tangy. My first batch turned out like a sour marinade; now I adjust in stages. ---
- GARLIC SKINS MATTER: Peel the garlic cloves and scrape off the papery skins—those little bits add depth without overpowering. I was lazy about this for years until I noticed the difference in a single bite. ---
- LOW AND SLOW AFTER SEARING: After the initial sear, drop the heat to 275°F (135°C) and let the pork cook uncovered—this evens out the sugar caramelization without burning. Rushing this step gives you a sticky glaze, not a glossy one.
Perfect pairings for this dish
Traditional Filipino Sides
Start with steamed jasmine rice—it's the perfect neutral base that lets the smoky, tangy flavors of the pork shine. I always cook up 2 cups of rice per serving, as Filipinos believe a meal isn't complete without it. For extra authenticity, try sinangag (garlic fried rice) made with day-old rice, 2 tbsp minced garlic, and 1 tbsp soy sauce—it adds a savory crunch that balances the dish beautifully. 🍚
No Filipino BBQ table is complete without atchara (pickled papaya), which cuts through the richness of the pork. You can find it pre-made in the Asian grocery aisle or make your own with 1 cup shredded papaya, ½ cup vinegar, 1 tbsp sugar, and 1 tsp salt. The tangy, crunchy texture is essential for that perfect bite contrast. For a modern twist, add thinly sliced cucumbers or shredded carrots to the atchara for extra freshness.
Asian-Inspired Vegetables
Grilled or stir-fried vegetables add color and freshness to your plate. I love kinchay (long beans) stir-fried with 1 tbsp soy sauce, 1 tsp sugar, and 1 minced garlic clove—they hold their shape and add a satisfying crunch. Another favorite is bagoong (shrimp paste) sautéed with eggplant—just ½ cup shrimp paste, 1 sliced eggplant, and 1 tbsp oil create a salty, umami-rich side that pairs perfectly with the pork.
Drink Pairings
For a refreshing contrast, serve calamansi juice—this Filipino citrus is tart and bright, cutting through the richness of the pork. Mix ½ cup calamansi juice, ½ cup water, and 1 tbsp sugar for a simple, refreshing drink. If you can't find calamansi, limeade or yuzu soda work in a pinch. For something stronger, a light lager like San Miguel or Tuborg complements the smoky flavors without overpowering them. 🍹
Modern Twists
Want to elevate your meal? Add a mango avocado salad with 1 diced mango, ½ avocado, and a dressing of 1 tbsp lime juice, 1 tbsp olive oil, and ½ tsp honey. The sweetness of the mango balances the tangy pork beautifully. For a heartier option, serve with garlic butter corn—just 2 cups corn kernels, 2 tbsp butter, and 1 minced garlic clove sautéed together. These modern sides keep the dish fresh while staying true to Filipino flavors.
Nutrition facts
Frequently asked questions
What's the secret to getting that perfect charred crust on pork liempo?
Use hot charcoal or hardwood chips and cook the pork skin-side down until deep black spots form (15-20 minutes). The key is patience—don't rush this step. Cover with foil to trap heat and smoke, then flip carefully. The char develops best when the pork is seared directly over the embers.
Can I make pork liempo without charcoal? What's the best substitute?
Use hardwood chunks (hickory or oak) in your smoker or grill, or even soaked wood chips in a grill pan. For stovetop cooking, try a cast iron skillet with mesquite wood pellets for smokiness. The vinegar glaze still works—just focus on getting that crispy char from high heat.
Why does my pork turn out dry? How do I fix it?
The most common mistake is overcooking. Use a meat thermometer and stop at 195-203°F—the pork should be fork-tender but not dry. For extra moisture, baste frequently with the vinegar glaze (every 30 minutes) and consider adding 1 tbsp soy sauce to the marinade. If using pork shoulder, trim excess fat first.
What's the difference between pork liempo and regular BBQ pork?
Liempo is all about the charred exterior and vinegar glaze, while traditional BBQ focuses on smoky rubs or sauces. The pork is cooked low-and-slow but gets that signature crispy char from direct heat. Liempo also uses white vinegar and sugar for a sweet-tangy finish, whereas BBQ often relies on tomato-based sauces or dry rubs.
Can I prep this recipe ahead of time?
Yes! Marinate the pork for up to 24 hours ahead, then char and slow-cook as directed. For make-ahead meals, cook the pork completely, then refrigerate. Reheat in a skillet over medium heat with a splash of water to revive the crispy edges. The vinegar glaze can be made 3 days ahead and stored in the fridge.