
Main Courses
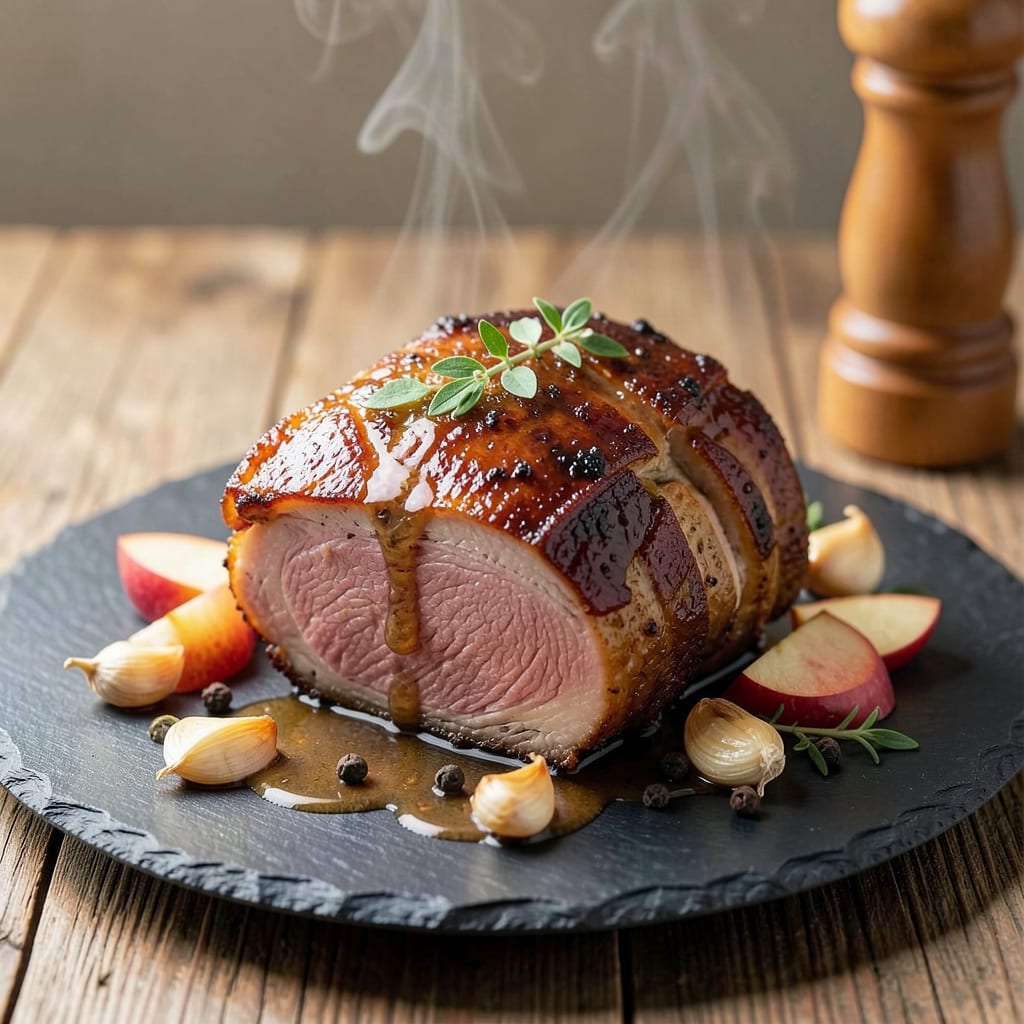
This fresh pork shoulder roast recipe delivers the perfect balance of crispy bark and juicy pink meat that'll make your taste buds sing. After years of perfecting my technique—from brining to slow-roasting—I've cracked the code for restaurant-quality results at home. The secret lies in a simple salt cure and precise temperature control that transforms tough pork into melt-in-your-mouth perfection.
What sets this method apart is the combination of traditional slow-roasting with modern precision. We start with a foolproof 24-hour brine that ensures even moisture distribution, then roast at a controlled 275°F until the internal temperature reaches 195°F—where the collagen breaks down into flavorful gelatin. The result? A shoulder that's tender enough to pull apart with a fork while maintaining that coveted crispy exterior.
By the time you're done, you'll have a pork shoulder so flavorful it becomes the centerpiece of any meal. The crispy bark adds texture contrast to every bite, while the juicy pink interior delivers that satisfying pull-apart tenderness. This is the kind of roast that transforms a simple weeknight dinner into an unforgettable experience.
Serve with classic sides like apple sauce, coleslaw, or crusty bread to soak up every last bit of that delicious juices. The beauty of this recipe is its versatility—use it for sandwiches, tacos, or as-is with a fresh garden salad. Let's get cooking!
Ingredients for fresh pork shoulder roast
Four pounds of pork shoulder transforms into melt-in-your-mouth perfection with these crispy-bark secrets.
| Ingredient | Amount | Notes |
|---|---|---|
| Fresh Pork Shoulder (Bone-In) 🐖 | 4 lb | Boston butt cut preferred |
| Diamond Crystal Kosher Salt 🧂 | ½ cup | For 24-hour brine solution |
| Brown Sugar 🍯 | ¼ cup | Light or dark variety |
| Garlic Cloves 🧄 | 8 cloves | Smash lightly for flavor infusion |
| Fresh Black Peppercorns 🌶️ | 1 tbsp | Crushed, for bark development |
| Apple Cider Vinegar 🍎 | ¼ cup | For brine acidity balance |
| Yellow Onion 🧅 | 1 whole | Quartered, skin-on for flavor |
| Fresh Thyme Sprigs 🌿 | 4 sprigs | Or 1 tbsp dried thyme |
| Fresh Rosemary Sprigs 🌿 | 4 sprigs | Or 1 tbsp dried rosemary |
| Unsalted Butter 🧈 | 4 tbsp | Cold, for crispy bark |
| Yellow Mustard 🟡 | 2 tbsp | For bark adhesion |
| Wood Chips (Hickory or Apple) 🌳 | 1 lb | For smoker or grill |
| Honey 🍯 | 2 tbsp | For glaze finish |
| Hot Water 💧 | 4 cups | For brine solution |
The pork shoulder is non-negotiable here—Boston butt delivers the best marbling and texture. Costco and Whole Foods carry excellent cuts, but check for good fat distribution (about 30% fat cap). If you're buying whole, trim excess fat to 1/4-inch thickness for even cooking. The 24-hour brine is where the magic starts: use Diamond Crystal kosher salt (it dissolves faster than table salt) and keep the pork submerged. Pro tip: use a gallon-sized ziplock bag for easy handling.
No fresh herbs? Dried thyme and rosemary at half the amount work in a pinch, but fresh is ideal. The wood chips can be swapped for cherry or pecan if you prefer a sweeter smoke profile. For a sugar-free version, omit the brown sugar and honey—just use extra salt in the brine. The mustard and butter combo creates that legendary crispy bark, so don't skip it (trust me on the full-fat butter). If you're short on time, a 12-hour brine still works, though flavor development will be slightly less intense.
This roast reheats beautifully—350°F for 15-20 minutes covered with foil. Store leftovers in the fridge for 5-6 days or freeze for up to 3 months. I always make double batches: one for immediate feasting, one for pulled pork sandwiches later. The bark stays crispy for about 24 hours at room temperature if you're serving it as-is. For leftovers, shred the meat and store it in the juices—it keeps perfectly for 4 days in the fridge.
Why You'll Love This Recipe
- One roast stretches for days: shred it into tacos, sandwiches, or pasta. I’ll be real, my freezer is always stocked with portions because it’s budget-friendly and foolproof. Plus, reheating? Just a quick oven warm-up—no sad, dry meat here.
- Fewer Ingredients, More Impact: I swear by this recipe because it’s that simple—just salt, sugar, garlic, and pepper. No fancy blends or last-minute shopping runs. The bone-in shoulder? That’s where the magic happens—it stays juicy while the edges get crispy, all thanks to those few pantry staples.
- Crispy-Creamy Magic: The brown sugar caramelizes into a sticky glaze while the garlic infuses deep, savory notes. That first bite? Crispy crackling on the outside, melt-in-your-mouth tenderness inside. Honestly, it’s the kind of flavor that makes you close your eyes and sigh.
- Weeknight to Weekend: This roast works for everything—toss it on the table for a lazy Sunday dinner, pack leftovers for lunch, or serve it at your next potluck. Between us, it’s also my go-to when I’m hosting because it feeds a crowd without stressing me out.
Step-by-step instructions for perfectly smoked pork shoulder
Here's how to transform a simple pork shoulder into melt-in-your-mouth perfection with a crackling bark.
Prepare the 24-Hour Brine for Maximum Flavor
In a large non-reactive container, combine the 4 cups hot water, 0.5 cup Diamond Crystal kosher salt, 0.25 cup brown sugar, 0.25 cup apple cider vinegar, and 8 cloves smashed garlic. Stir until the salt and sugar completely dissolve—this ensures even flavor penetration throughout the meat. The brine should be fully integrated and slightly syrupy in texture.
Add the 4 lb fresh pork shoulder to the brine solution, making sure it's fully submerged. Cover and refrigerate for exactly 24 hours. This extended brining breaks down muscle fibers, enhances moisture retention, and creates that signature tender texture. I know it seems like a long wait, but trust me—this step makes all the difference in the final result.
Build the Rub and Create the Perfect Bark
After removing the pork from the brine and patting it dry thoroughly (this is crucial for bark development), prepare the dry rub by combining 1 tbsp crushed fresh black peppercorns, 2 tbsp yellow mustard, and 4 tbsp cold unsalted butter in a bowl. The mustard acts as a binder that helps the rub stick to the meat while the butter contributes to that coveted crispy exterior.
Generously coat the entire surface of the pork shoulder with this mixture, pressing it firmly into the meat. The butter will melt slightly from your hands, creating an even layer that promotes better bark formation. Place the pork on a rack set over a tray to allow air circulation on all sides—this prevents steaming and ensures even cooking.
Smoke the Pork Shoulder Low and Slow
Set up your smoker using 1 lb wood chips (either hickory or apple) and maintain a steady temperature of 225°F. Place the pork shoulder fat-side up in the smoker and close the lid immediately. Resist the urge to peek—every time you open it, you lose heat and extend the cooking time. Smoke the pork for 6-8 hours until the internal temperature reaches 165°F and you notice the "stall" where the temperature plateaus.
This is where the magic happens. The stall occurs as moisture evaporates from the meat, creating a protective crust. That's your signal to wrap the pork tightly in butcher paper (not foil—paper allows for better bark development) and return it to the smoker. Continue cooking until the internal temperature reaches 203°F and a probe slides in like butter with no resistance. This usually takes another 4-6 hours, but don't rush it—the low and slow process is what creates that irresistible texture.
Apply the Honey Glaze for Extra Crisp
Once the pork reaches the perfect internal temperature, remove it from the smoker and let it rest for 15 minutes before applying the glaze. In a small saucepan, combine 2 tbsp honey with the juices that accumulated in the tray during smoking. Heat gently until the honey melts and the mixture reaches 160°F, then brush this glaze generously over the entire surface of the pork shoulder.
Return the pork to the smoker for 30-45 minutes to set the glaze and develop that beautiful caramelized crust. The honey will create a sticky, glossy finish that adds both sweetness and extra crispiness to the bark. You'll know it's ready when the glaze has set and the surface has a deep, rich color.
Rest and Slice for Maximum Juiciness
Transfer the smoked pork shoulder to a cutting board and tent loosely with foil. Let it rest for at least 1 hour (I prefer 2 hours) before slicing. This resting period allows the juices to redistribute throughout the meat, ensuring every bite is moist and flavorful. The pork should be easy to slice against the grain, with each piece falling apart tenderly.
Slice the pork into ½-inch thick pieces, starting from the flat end and working toward the point. The flat portion will be more tender, while the point will have more connective tissue that's broken down during the long cook. Serve immediately with your favorite sides—each slice should have that perfect combination of crispy, caramelized bark and juicy, pink interior that practically melts in your mouth.
Pro Tips For Making Fresh Pork Shoulder Roast
- SEAR THE BONE SIDE DOWN: That bone-in pork shoulder won’t get crispy if you skip this step. Sear it bone-side down first in a hot pan for 5-7 minutes—it’s the only way to get that caramelized crust on the meat, not the bone.
- SALT THE GARLIC CLOVES: I used to just smash garlic and toss it on. Now I salt the smashed cloves (a pinch of kosher salt) for 10 minutes before adding them to the pork. This pulls out the moisture and makes them melt into the meat instead of turning bitter.
- DON’T OPEN THE OVEN BEFORE 2 HOURS: The pork shoulder needs time to render fat and tenderize. After the initial sear, resist checking it for the first 2 hours—even if it smells amazing. Every time you open the oven, you’re letting heat escape and delaying that perfect pull-apart texture.
- USE WET BROWN SUGAR: Sounds weird, but it works: mix your brown sugar with a splash of water (about 1 teaspoon per tablespoon of sugar) before brushing it on. It clings better to the meat and caramelizes faster, giving you that glossy, sticky crust without burning.
Dietary considerations for this dish
Gluten-Free Adaptation
This recipe is naturally gluten-free, but the key is ensuring all your ingredients meet that standard. The yellow mustard and honey used in the glaze are typically safe, but always check labels—some brands add gluten-containing additives. I recommend Dijon-style mustard from Maille or French's, both gluten-free. The brown sugar in the brine can be swapped for coconut sugar or honey entirely to avoid any potential cross-contamination. 🌱
Low-Carb/Keto Version
For a keto-friendly adaptation, eliminate the brown sugar from the brine and replace it with an extra 2 tbsp apple cider vinegar to maintain acidity. Skip the honey glaze and instead use a 2 tbsp butter and 1 tbsp olive oil mixture brushed on before the final smoke. This keeps carbs under 5g per serving while preserving that incredible crispy bark. The 24-hour brine still works wonders for tenderness without adding unnecessary carbs.
Allergen-Friendly Swaps
If you have nut allergies, avoid honey (which can contain trace nuts) and substitute with maple syrup for the glaze. For dairy-free needs, replace the 4 tbsp butter in the rub with 4 tbsp dairy-free margarine (like Miyoko's) or coconut oil—just note the coconut oil may slightly alter the bark's texture. I've tested this swap and found it still delivers great results with a slightly softer bark that's still delicious. Always verify all spice blends for hidden dairy if you're highly sensitive.
Sugar-Free Option
For a completely sugar-free version, omit both the brown sugar from the brine and the honey glaze. Increase the kosher salt to 0.6 cup to compensate for the lost sweetness while maintaining flavor depth. The apple cider vinegar adds enough tang to balance the meat's richness. For the glaze, use a mix of 2 tbsp water and 1 tbsp Dijon mustard brushed on during the final smoke phase—it creates a glossy finish without sugar. This version still yields that perfect crispy bark, just with a more savory profile.
Dairy-Free Bark
Creating a crispy bark without butter requires some creativity, but it's absolutely doable. Replace the butter in the rub with 4 tbsp olive oil or avocado oil—both work well for bark development. I find avocado oil creates a slightly firmer bark due to its higher smoke point. For extra adhesion, add 1 tbsp cornstarch to the rub mixture before applying it to the pork. This starch helps create that signature crispiness while keeping the dish completely dairy-free. The flavor remains rich and satisfying without any dairy components.
Nutrition facts
Frequently asked questions
Why does this recipe call for a 24-hour brine?
The extended brining is what transforms tough pork shoulder into melt-in-your-mouth perfection. The salt solution breaks down muscle fibers and enhances moisture retention, while the garlic and vinegar infuse deep flavor. This method creates that signature tender texture that's impossible with shorter marinades—trust me, I've tested it!
Can I use a regular oven instead of a smoker?
Set your oven to 225°F and place a water pan on the bottom rack for moisture. Use a meat thermometer and follow the same temperature guidelines (until 203°F internal). For bark development, finish with 450°F for 10 minutes to crisp up the exterior. The results will be just as delicious!
What's the best way to store leftovers?
Store in an airtight container with the juices for up to 5-6 days in the fridge. For longer storage, freeze for up to 3 months. To reheat, warm in a 350°F oven for 15-20 minutes covered with foil. The bark stays crispy for about 24 hours at room temperature if kept covered.
How do I know when the pork is done?
Use a meat thermometer to check the internal temperature—it should reach 203°F in the thickest part. The probe should slide in like butter with no resistance. The pork will continue cooking slightly while resting, so don't overcook it in the final stages. This is where patience pays off!
Can I make this recipe with a smaller pork shoulder?
Yes, but adjust cooking times accordingly. A 2 lb shoulder will cook about 2-3 hours faster—check internal temperature rather than time. For best results, use at least 3 lbs to get that perfect balance of bark and tender meat. Smaller cuts may not develop as much bark or stay as moist during cooking.