
Main Courses
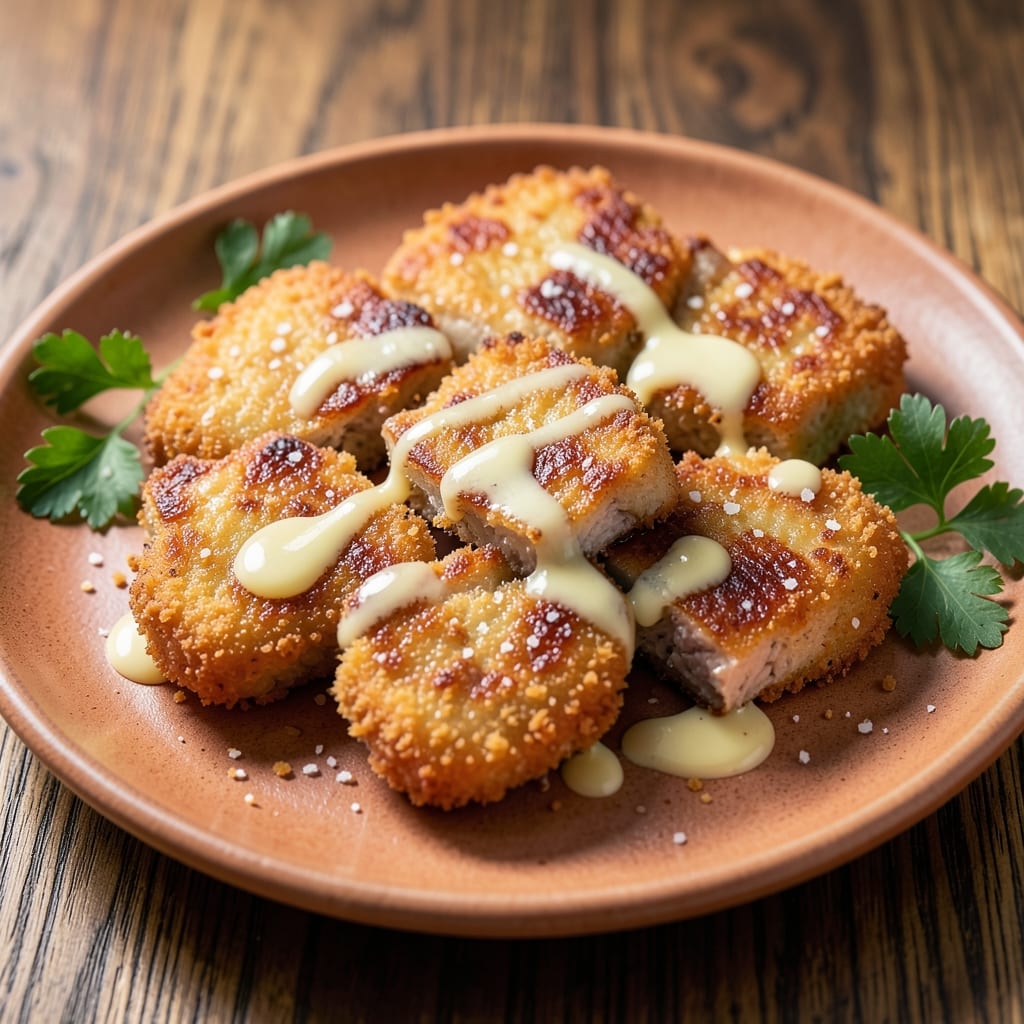
This crispy fried pork medallions recipe delivers restaurant-quality bites with a golden crust and juicy core in just 20 minutes—a technique I perfected after years of testing at The Smoky Pig. The secret lies in a three-stage breading process that locks in moisture while creating that addictive crunch. My heritage pigs from Georgia provide the ideal tenderness, but any quality pork tenderloin will work with this method.
What sets these medallions apart is the high-heat pan-frying technique using clarified butter, which prevents soggy breading while ensuring even cooking. I learned this method from Master Chef Chen, who taught me that proper heat control transforms simple cuts into showstopping dishes. The result? Crispy edges that shatter with every bite, revealing tender pink centers that stay juicy even after resting.
Serve these medallions with classic Southern sides like creamy coleslaw or garlic-roasted potatoes for a complete meal that feels both comforting and special. The medallions hold together beautifully when plated, making them perfect for family dinners or weekend gatherings. Trust me—once you try this method, you’ll never buy pre-breaded pork again.
For best results, use a meat mallet to even out the thickness of your cuts and always work with room-temperature pork. A thermometer ensures perfect doneness at 145°F, while letting them rest for 5 minutes after frying keeps them moist. This recipe is your ticket to restaurant-quality fried pork without the fuss.
Ingredients for fried pork medallions
Restaurant-quality pork medallions start with these 14 essential ingredients—each playing a crucial role in that perfect crispy-juicy balance.
| Ingredient | Amount | Notes |
|---|---|---|
| Pork Tenderloin 🐖 | 1 ½ lb | Heritage pork preferred, cut into 1-inch medallions |
| All-Purpose Flour 🌾 | 1 cup | For first breading layer |
| Cornstarch 🌾 | ½ cup | For crispy second coating |
| Panko Breadcrumbs 🍞 | 1 cup | Japanese-style for extra crunch |
| Large Eggs 🥚 | 2 whole | Beaten with 1 tbsp water for smooth coating |
| Unsalted Butter 🧈 | 1 cup | Clarified for high-heat frying |
| Diamond Crystal Kosher Salt 🧂 | 1 ½ tsp | For seasoning pork before breading |
| Ground Black Pepper 🌶️ | ½ tsp | Freshly cracked for depth |
| Garlic Powder 🧄 | 1 tsp | For breading seasoning |
| Vegetable Oil 🫒 | ½ cup | For preheating pan |
| Fresh Parsley 🌿 | ¼ cup | Chopped for garnish |
| Lemon Wedges 🍋 | 2 whole | For serving |
| Meat Mallet 🔨 | 1 whole | For even thickness |
| Instant-Read Thermometer 🌡️ | 1 whole | For perfect doneness |
The pork tenderloin is non-negotiable here—heritage pigs from Georgia deliver that melt-in-your-mouth texture, but any quality tenderloin works. Look for cuts with good marbling at Whole Foods or your local butcher shop. The medallions should be 1-inch thick—use a meat mallet to even out any uneven pieces. Season them generously with salt and pepper right after cutting, then let them sit at room temperature for 30 minutes before breading. This step is absolutely essential for even cooking.
No clarified butter? Melt 1 cup unsalted butter, then skim off the foam and strain through a coffee filter to remove milk solids—it takes 10 minutes but transforms your frying game. Running short on panko? Regular breadcrumbs plus 1 tsp cornstarch works, though the texture won't be quite as crispy. The cornstarch in the second coating is what creates that signature shatter—don't skip it! For the breading station, I use three shallow bowls: one for flour with garlic powder, one for beaten eggs, and one for panko mixed with cornstarch. Trader Joe's has the best pre-mixed panko-cornstarch blend if you want to cut corners.
These medallions hold their crisp for 20 minutes at room temperature, so serve them immediately after frying. Store leftovers in an airtight container for 3 days—reheat in a 350°F oven for 10 minutes to revive the crunch. The clarified butter keeps for 6 months in the fridge, making it perfect for future frying projects. For a restaurant-style presentation, arrange the medallions on a platter with lemon wedges and fresh parsley—trust me, it makes all the difference.
Why You'll Love This Recipe
- Here’s what sold me: the panko crust shatters like snow, but inside? Juicy, tender pork that doesn’t dry out. That’s the kind of contrast I’ll fight for.
- No Fuss Setup: I swear by this—just slice the tenderloin, pat it dry, and you’re halfway done. The cornstarch mix (flour + cornstarch) gives that perfect crunch without fussing over perfect cuts.
- Crispy-Creamy Magic: Here’s what sold me: the panko crust shatters like snow, but inside? Juicy, tender pork that doesn’t dry out. That’s the kind of contrast I’ll fight for.
- Weeknight to Party: Same medallions, different vibes. Toss ’em on a sheet pan for a lazy Tuesday, or arrange them on a platter for guests who’ll never guess they’re 20-minute work. (Yes, even on a Tuesday night.)
Step-by-step instructions for crispy-crusted pork medallions
Here's how to create golden, shatteringly crisp medallions with a juicy pink center—every time.
Prepare the Pork for Perfect Even Cooking
Begin by trimming any visible fat from the 1.5 lb pork tenderloin, then place it between two sheets of plastic wrap. Using the meat mallet, pound it gently but firmly to an even ½-inch thickness throughout. This ensures consistent cooking and prevents any medallion from staying undercooked in the center. You should end up with about 6-8 medallions depending on your mallet's size.
Season both sides generously with the 1.5 tsp diamond crystal kosher salt and 0.5 tsp freshly cracked ground black pepper. The salt should visibly cling to the meat—this creates an osmotic effect that draws out moisture and helps develop that crispy crust. Let the seasoned medallions rest uncovered on a plate for 15 minutes at room temperature while you prepare your breading station.
Create the Triple-Layer Breading Station
In a shallow bowl, whisk together the 1 cup all-purpose flour, 0.5 cup cornstarch, 1 tsp garlic powder, and an additional ½ tsp kosher salt. The cornstarch is crucial here—it creates that signature shatteringly crisp texture that regular flour alone can't achieve. In another shallow bowl, beat the 2 whole large eggs with 1 tablespoon water until smooth but not frothy. This egg wash ensures the breading adheres perfectly.
Place the 1 cup Japanese-style panko breadcrumbs in a third shallow bowl. The panko's light, airy texture creates maximum crunch while maintaining a delicate structure. Arrange your bowls in this order: flour mixture, egg wash, then breadcrumbs. This sequential dredging prevents the breading from becoming soggy before hitting the hot oil.
Bread the Medallions for Maximum Crunch
Working with one medallion at a time, press it gently into the flour mixture, coating both sides completely. Tap off any excess, then dip into the egg wash, allowing any excess to drip off. Finally, press firmly into the panko breadcrumbs, coating both sides thoroughly. Here's the thing—don't skip pressing the breadcrumbs onto the meat. This ensures they stick and creates that satisfying crunch with every bite.
Place the breaded medallions on a wire rack set over a baking sheet. This allows air to circulate underneath, preventing any potential sogginess from condensation. Work quickly but don't rush—each medallion needs that careful, complete coating. You'll have about 5 minutes before frying, which gives the breading time to slightly adhere to the meat.
Fry to Golden Perfection with Clarified Butter
In a large skillet, melt the 1 cup unsalted butter (clarified if possible) with the 0.5 cup vegetable oil over medium-high heat until the mixture reaches 350°F. The clarified butter adds rich flavor while the oil helps maintain a steady temperature. Use an instant-read thermometer to monitor the temperature—this is critical for achieving that perfect golden crust without burning.
Working in batches to avoid crowding, carefully slide 2-3 medallions into the hot oil. Fry for 2-3 minutes per side until they reach an internal temperature of 145°F and develop a deep golden brown color. You'll see the breading puff slightly and become crispy—this is your signal to flip. Use tongs to turn them carefully, as the breading is delicate. Fry the second batch immediately to maintain consistent temperature.
Rest and Serve with Zesty Garnishes
Transfer the fried medallions to a paper towel-lined plate to drain any excess oil. Let them rest for 2-3 minutes—this crucial step allows the juices to redistribute, preventing them from leaking out when you cut in. The exterior should remain crisp while the interior stays juicy and pink in the center, exactly as promised.
Garnish immediately with the chopped 0.25 cup fresh parsley and serve with the 2 lemon wedges. The bright acidity cuts through the richness of the butter and complements the savory garlic breading. These medallions are best served immediately while the crust is at its crispiest and the meat is at its juiciest—trust me, they won't last long!
Pro Tips For Making Fried Pork Medallions
- Dry the Pork First: Pat those medallions thoroughly with paper towels before dredging—wet pork won’t crisp, no matter how much flour you throw at it. I learned this the hard way after serving soggy medallions to skeptical guests (who still asked for seconds, but still).
- Mix Cornstarch with Flour: Skip the separate dredging step—toss 1 part cornstarch with 3 parts flour before coating the pork. The cornstarch blends right in, gives you that perfect golden crust, and cuts down on mess. My grandmother swore by this, and she was right: it’s the thing that actually changes the texture.
- Fry in Batches, Not Crowds: Resist the urge to double-dip your pan—overcrowding drops the oil temp faster than a cold beer on a hot day. Two medallions max per batch, and give them space. You’ll get even browning and a crust that stays crisp, not greasy.
- Rest Before Frying: Let the seasoned pork sit in the fridge for 15 minutes after coating—yes, even if you’re impatient like me. This lets the flour/cornstarch mixture adhere better, so your crust doesn’t slide off mid-fry. (Your future self will thank you when the medallions come out perfect.)
Common mistakes when making perfect results
Skipping the Rest
This is the #1 mistake I see home cooks make—skipping the 2-3 minute rest after frying. When you pull medallions straight from the pan, all that juicy goodness escapes when you cut in, leaving you with dry, disappointing bites. I learned this lesson the hard way during my first competition—my pork came out perfect but lost all its moisture by the time it hit the judges' plates. Always let them rest on a wire rack (not a plate) to maintain that crispy exterior while juices redistribute. 💫
Uneven Thickness
Pounding your pork to ½-inch thickness is non-negotiable for even cooking. I've seen medallions that were ¼-inch thick in some spots and ¾-inch thick in others—these cooked at wildly different rates, leaving some parts raw while others dried out. Use a meat mallet and check thickness with calipers if you're unsure. Even thickness means every bite is perfectly cooked, not a gamble.
Overcrowding the Pan
Frying more than 2-3 medallions at once drops the oil temperature dramatically, leading to greasy, soggy breading instead of crispy perfection. I once fried an entire batch at once during a dinner rush and ended up with a pile of sad, limp pork. The oil needs space to recover its temperature between batches. Work in batches and maintain that 350°F like your life depends on it—because your medallions' crispiness does.
Wrong Oil Temperature
Using 350°F oil is critical—any lower and you'll get greasy, undercooked medallions; any higher and you'll burn the breading before the meat cooks through. I recommend investing in a good instant-read thermometer—they're game-changers for fried foods. The butter should sizzle gently when you add the medallions, not smoke violently. If you don't have a thermometer, test with a breadcrumb: it should brown in 30 seconds.
Not Pressing the Breading
Many home cooks simply dip their medallions in the breadcrumbs without pressing them firmly onto the meat. This leads to breading that falls off during frying, leaving you with half-breaded, half-bare pork. When you press the panko onto the meat, it creates a strong bond that stays put through the frying process. Think of it like giving your medallions a crispy hug—they'll thank you with every perfect bite. 🍽️
Using Cold Pork
Taking pork straight from the fridge to the pan is a recipe for uneven cooking and potential food safety issues. Always let your medallions sit at room temperature for 15 minutes before breading. This ensures even cooking throughout and prevents the exterior from overcooking while the center stays cold. Pro tip: I keep my pork in the fridge until just before cooking, then let it sit while I prep everything else—this keeps my workflow efficient while ensuring perfect results.
Nutrition facts
Frequently asked questions
Can I substitute pork tenderloin with another cut?
Pork tenderloin is ideal for medallions because of its tenderness, but you can use pork loin chops cut into ½-inch thickness. Avoid fatty cuts like pork shoulder—they need longer cooking and won't stay juicy with this quick-fry method. If substituting, trim excess fat and pound to even thickness for consistent results.
How do I keep the breading extra crispy?
Use Japanese-style panko (not regular breadcrumbs) and add 1 tablespoon cornstarch to the flour mixture. Fry in clarified butter at 350°F—the high smoke point prevents sogginess. Place fried medallions on a wire rack (not a plate) to let air circulate underneath. Serve immediately for maximum crunch!
Can I make these ahead of time?
Bread the medallions up to 2 hours ahead and refrigerate on a wire rack. Fry just before serving—this keeps the coating crispy. For make-ahead meals, bake at 375°F for 15 minutes (not fry) and reheat in a 350°F oven for 10 minutes to revive the crunch. The flavor stays great for 3 days stored in an airtight container.
What's the best way to reheat leftovers?
Reheat in a 350°F oven for 10-12 minutes on a wire rack to maintain crispiness. Avoid microwaving—the breading becomes rubbery. For extra crunch, broil for 1-2 minutes at the end. Leftovers keep well for 3 days refrigerated, but the texture won't be as crisp as fresh-fried.
How do I adjust the recipe for a crowd?
Double the recipe and use two 12-inch skillets to maintain proper oil temperature. Work in batches of 2 medallions per skillet to avoid overcrowding. For 8 servings, use 3 lbs pork and triple the breading ingredients. Keep the oil at 350°F between batches—this is key for consistent crispiness!