
Main Courses
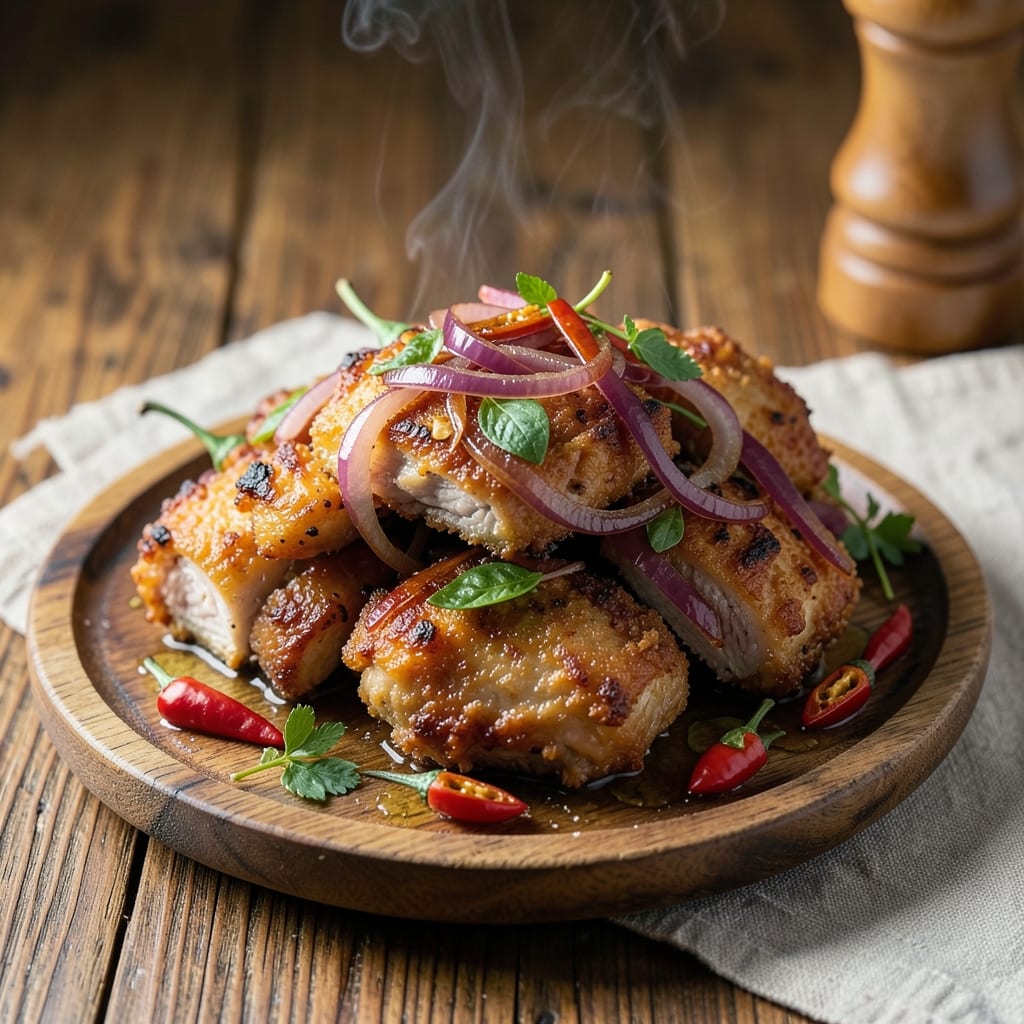
This fried pork sisig recipe delivers the perfect balance of crispy edges and juicy hearts that make every bite irresistible. 🔥 Born from Filipino street food traditions, this dish transforms humble pork into a symphony of textures and flavors—crunchy fried pork, tender centers, and a tangy vinegar-kissed finish that lingers. I first tasted sisig in Manila's bustling markets, where the sizzle of pork frying over charcoal drew crowds, and I've since perfected it in my own kitchen with a deep-fried twist that adds an extra layer of indulgence.
The secret lies in the two-stage cooking process: first frying the pork until golden and crispy, then assembling it with sautéed onions, chili, and a splash of vinegar that brightens every bite. This isn't just a recipe—it's a celebration of Filipino comfort food, where the pork's richness meets the sharp tang of vinegar in a way that feels both nostalgic and exciting. The result is a dish that's equally at home as a tapas-style appetizer or a hearty main course with steamed rice.
What makes this version special is the crispy texture that comes from double-frying the pork—first to render the fat, then again to achieve that satisfying crunch. The vinegar doesn't just add acidity; it transforms the dish into something vibrant and alive, cutting through the richness while enhancing the pork's natural sweetness. Whether you're serving it at a gathering or enjoying it as a solo meal, this sisig delivers restaurant-quality flavor with a technique that's surprisingly straightforward.
For those who love to experiment, consider adding liver for extra richness or sprinkling cheese on top for a melty twist. The beauty of sisig is its adaptability—it's a canvas for your favorite flavors, but the core technique remains the same: crispy, juicy, and tangy. Let's get cooking!
Ingredients for fried pork sisig
Pork shoulder, crispy edges, and tangy vinegar—these are the stars of your perfect sisig.
| Ingredient | Amount | Notes |
|---|---|---|
| Pork Shoulder 🐖 | 1 ½ lb | Cut into 1-inch cubes, skin removed |
| All-Purpose Flour 🌾 | ½ cup | For dredging pork cubes |
| Large Eggs 🥚 | 2 whole | Beaten for egg wash |
| Yellow Onions 🧅 | 1 whole | Thinly sliced, about 1.5 cups |
| Bird's Eye Chilies 🌶️ | 4 whole | Minced, adjust for heat preference |
| Canola Oil 🫒 | 3 cups | For deep frying, neutral flavor |
| White Vinegar 💧 | ¼ cup | White or cane vinegar preferred |
| Garlic Cloves 🧄 | 4 cloves | Minced, for sautéing onions |
| Salt 🧂 | 1 ½ tsp | Kosher or sea salt, adjust to taste |
| Black Pepper 🌶️ | ½ tsp | Freshly ground for best flavor |
| Vegetable Oil 🫒 | ¼ cup | For sautéing onions and chili |
| Fresh Calamansi or Lime 🍋 | 1 whole | Juiced, for bright finish (optional) |
| Green Onions 🧅 | 4 whole | Thinly sliced, for garnish |
The pork shoulder is non-negotiable here—it's got the right amount of fat for that juicy, crispy texture. Ask your butcher for the fatty cuts if you're unsure, or grab a pre-cut pork shoulder from Costco or Whole Foods. Look for pieces with good marbling; that's what gives you the crispy edges and tender centers. If you can't find pork shoulder, pork belly works too, but it's pricier. Cut the meat into even 1-inch cubes—this ensures everything cooks at the same rate. For the chilies, Filipino markets or Asian grocery stores have the freshest bird's eye chilies, but regular serrano peppers work in a pinch if you can't find them.
No canola oil? Vegetable or peanut oil works just as well—just avoid olive oil, which burns at high heat. The vinegar is key for that bright, tangy finish, but if you're out, rice vinegar or even lemon juice will do in a pinch. Fresh calamansi is ideal, but lime or even a splash of extra vinegar keeps the dish vibrant. The green onions are just for garnish, so use whatever you've got—chives or regular onions work too. For extra richness, add a splash of soy sauce to the vinegar mixture, but don't skip the salt—it balances all the flavors. And trust me, double-frying the pork is worth the effort—it's the secret to that perfect crispy texture.
Pork cubes keep best in the fridge for 2 days if you pre-cook them, but raw pork stays fresh for 3-4 days. The fried pork loses crispiness after sitting, so assemble it right before serving. If you're making this ahead, keep the vinegar mixture separate until the last minute—it'll keep the pork fresh longer. The fried pork reheats beautifully in a 350°F oven for 10-15 minutes, just until it's crispy again. Store leftovers in an airtight container, but honestly, this disappears fast—it's that good.
Why You'll Love This Recipe
- Crispy in Minutes: The pork shoulder gets a quick batter dip—flour, egg, and a splash of water—then hits the pan until golden. No marinating, no waiting. That crunch? It happens faster than you can dice an onion.
- Spicy-Sweet Magic: The onions caramelize into sweet, sticky pools while the bird’s eye chilies add just enough heat to wake up your taste buds. Honestly, the combo of crispy pork and that smoky-sweet onion jam is why I keep making this.
- Party or Pantry: Slap it on a platter with rice and a cold beer for game day, or pack leftovers for lunch—it reheats like a dream. My college friends still ask for seconds, even after three helpings.
- Budget Win: Pork shoulder’s cheap, and a single batch stretches across two meals. (Yes, even on a Tuesday night.) Plus, the chilies and onions bulk up the flavor without breaking the bank—this is comfort food that doesn’t guilt-trip you.
Step-by-step instructions for fried pork sisig
Here's how to make crispy, vinegar-kissed pork sisig that's juicy inside and perfectly golden outside.
👨🍳 Step 1: Prep and Season the Pork Cubes
Cut the 1.5 lb pork shoulder into 1-inch cubes, removing any skin or excess fat. In a large bowl, combine the pork cubes with 1.5 tsp salt and 0.5 tsp black pepper, tossing until evenly coated. Let them sit at room temperature for 15 minutes—this helps the seasoning penetrate and ensures even cooking.
While the pork seasons, prepare the dredging station: place the 0.5 cup all-purpose flour in a shallow dish and crack the 2 whole large eggs into another dish. Beating the eggs lightly with a fork creates a smooth coating that sticks perfectly to the pork. Here's the thing—don't skip this step. The double-dredge (flour, egg, flour) creates that signature crispy crust we're after.
🍳 Step 2: Double-Dredge for Maximum Crispiness
Working in batches, remove a handful of pork cubes and press them into the flour, coating all sides completely. Shake off any excess, then dip into the beaten egg, allowing any excess to drip off. Return to the flour dish and give them another thorough coating. This double-dredge is what gives sisig its iconic texture—crispy outside, tender inside.
Here's where it gets fun: place the coated pork cubes on a wire rack set over a baking sheet. This allows air to circulate around all sides, preventing them from sticking together. Let them rest for 5 minutes—this helps the flour coating adhere better and prevents them from falling apart when you fry them. Real talk: if they stick together now, they'll clump in the oil and you'll have to separate them later.
🔥 Step 3: Fry Until Golden Brown
Heat 3 cups canola oil in a deep skillet or Dutch oven to 350°F—use a thermometer to monitor this carefully. The oil should be hot enough that when you drop in a test cube, it sizzles immediately and floats to the surface. Add the pork cubes in a single layer (don't overcrowd—they'll steam instead of fry).
Fry for 3-4 minutes until the pork cubes are golden brown on all sides. You'll see them float to the surface as they cook—this is your visual cue that they're ready. Use a slotted spoon to transfer them to a paper towel-lined plate to drain excess oil. Don't rush this step; undercooked pork will be tough and greasy, not crispy and delicious. If you're frying in batches, maintain the oil temperature at 350°F between batches.
🍳 Step 4: Sauté the Onion-Chili Base
In the same skillet (no need to clean it—the pork bits add flavor), reduce heat to medium and add 0.25 cup vegetable oil. Add the 1 whole yellow onion (thinly sliced) and 4 cloves garlic (minced), cooking for 3-4 minutes until softened and just starting to brown. Here's the moment that matters: add the 4 whole bird's eye chilies (minced) and cook for another 1 minute—this releases their heat and aroma without burning them.
Pour in the 0.25 cup white vinegar and let it simmer for 2 minutes until most of the liquid evaporates. You're looking for a glossy, slightly sticky base here—this is what carries all that pork flavor. If it looks too dry, add 1 tablespoon water to loosen it up. This vinegar kiss is what makes sisig taste so bright and tangy.
🥘 Step 5: Combine and Finish with Freshness
Return the fried pork cubes to the skillet with the onion-chili base. Stir gently to coat everything in the sauce, letting it cook for 1-2 minutes so the pork absorbs all those delicious flavors. Taste and adjust seasoning—you might need a pinch more salt or pepper depending on your pork's natural saltiness.
Finish with the juice of 1 whole fresh calamansi or lime (about 2 tablespoons juice) and toss everything together. Garnish with 4 whole green onions (thinly sliced) for that fresh pop of color. Serve immediately while everything is hot and crispy—this dish doesn't wait. The contrast of crispy pork with juicy, vinegar-kissed centers is what makes sisig so special. Trust me, you'll want to eat it straight from the pan!
Pro Tips For Making Fried Pork Sisig
- Prep Pork Thin: Slice the pork shoulder against the grain into ¼-inch thick pieces—thinner cuts crisp faster and soak up less oil. I used to fight this step, but after burning three batches of unevenly cooked pork, I finally broke out the meat mallet. A sharp cleaver makes this easier, but a heavy knife works if you’re patient. ---
- Salt the Onions: Toss the sliced onions with ½ teaspoon salt before frying—it draws out moisture so they caramelize instead of steaming. I learned this the hard way when my first batch turned soggy. Do this while prepping the pork, and you’ll save time later. ---
- Double-Fry the Pork: Fry the pork once at high heat for a golden crust, then finish at medium-low to render fat without burning. The second fry cooks it through while keeping the exterior crisp. Skip this, and you’ll end up with greasy, undercooked centers—trust me, I’ve served that to guests. ---
- Blot, Don’t Rinse: Pat the pork dry with paper towels after coating, but don’t rinse the flour—trapped moisture weakens the crust. I was skeptical until I tried it: the batter sticks better, and the pork stays crispier longer. Yes, even if you’re impatient like me.
Best sauces and condiments for these flavors
Vinegar Brightness
White vinegar is the soul of this dish—its sharp acidity cuts through the pork's richness while enhancing its natural sweetness. I use ¼ cup white vinegar (or cane vinegar for a milder taste) and let it simmer until most of the liquid evaporates, creating a glossy, sticky base. This isn't just about acidity; it's about building a flavor bridge between the crispy pork and the tangy sauce. For extra depth, add 1 tsp soy sauce to the vinegar mixture—it adds umami that makes the dish sing. 💫
Chili Heat Control
The 4 whole bird's eye chilies (minced) bring the heat, but don't let them burn—cook them for just 1 minute after adding to the onions. If you prefer milder heat, remove the seeds and membranes first. For a smoky twist, toast the whole chilies in a dry skillet for 30 seconds before mincing and adding them. I like to keep a small bowl of minced chilies on hand so I can adjust the heat to taste at the end. 🌶️
Calamansi Zing
Fresh calamansi juice (or lime juice) is the secret weapon that elevates sisig from good to unforgettable. I squeeze 1 whole calamansi (about 2 tablespoons juice) over the finished dish right before serving. This final splash brightens all the flavors and adds a citrusy freshness that cuts through the richness. If you can't find calamansi, lime juice works beautifully—just use a little more since it's less concentrated. Trust me, this step is non-negotiable for that authentic Filipino tang. 🍋
Soy Sauce Depth
A splash of soy sauce in the vinegar mixture adds a savory depth that makes the dish more complex. I use 1 teaspoon light soy sauce (or ½ teaspoon dark soy sauce for a deeper color) mixed into the vinegar before simmering. This isn't just about saltiness—it's about adding that unmistakable umami that you find in street food versions. For extra richness, reduce the soy sauce mixture by half before adding it to the pork, creating a concentrated flavor bomb. 💛
Garlic-Onion Base
The foundation of any great sisig starts with properly caramelized onions and garlic. Cook the 1 whole yellow onion (thinly sliced) and 4 cloves garlic (minced) in ¼ cup vegetable oil over medium heat for 3-4 minutes until softened but not browned. This step builds the sweet, aromatic base that carries all the other flavors. If you're short on time, you can use 1 tablespoon onion powder and ½ teaspoon garlic powder instead, but fresh is always better. 🧅
Cheese Twist
For a modern twist, top your sisig with ¼ cup shredded cheddar or mozzarella cheese right before serving. The cheese melts beautifully over the hot pork, adding a creamy contrast to the crispy texture. I like to use Monterey Jack for a milder, slightly sweet flavor that complements the vinegar tang. This isn't traditional, but it's a crowd-pleaser that works especially well as an appetizer or tapas-style dish. 🧀
Nutrition facts
Frequently asked questions
Why does the pork need to be double-dredged for sisig?
The double-dredge (flour, egg, flour) creates that signature crispy-yet-tender texture that makes sisig irresistible. The first flour coating locks in moisture, while the egg acts as a glue. The final flour layer forms a golden-brown crust that shatters perfectly with each bite. Skipping this step results in soggy pork—trust the process!
Can I use pork belly instead of pork shoulder?
Pork belly works beautifully and has even more fat for that juicy, crispy texture. Just trim excess fat (leave some for flavor) and cut into ½-inch cubes instead of 1-inch. The belly's natural marbling makes it extra tender—perfect for sisig's rich, satisfying bite.
What's the best way to reheat leftover sisig?
Reheat in a 350°F oven for 10-15 minutes on a wire rack to restore crispiness. For extra crunch, broil for 1-2 minutes at the end. Avoid microwaving—it turns the pork rubbery. Pro tip: Keep components separate (pork + sauce) to reheat separately and assemble fresh.
How do I make this spicier or milder?
For extra heat, add 2-3 more bird's eye chilies or a dash of chili flakes. For milder heat, remove seeds/membranes or reduce to 2 chilies. For a smoky twist, toast whole chilies in a dry pan for 30 seconds before mincing. Always taste before serving!
Can I make sisig ahead of time?
Yes! Fry the pork and store separately in an airtight container for 2 days. Reheat pork alone (as above) and assemble with fresh vinegar mixture and garnishes. The key is keeping components separate until serving to maintain that perfect crispy texture.