
Main Courses
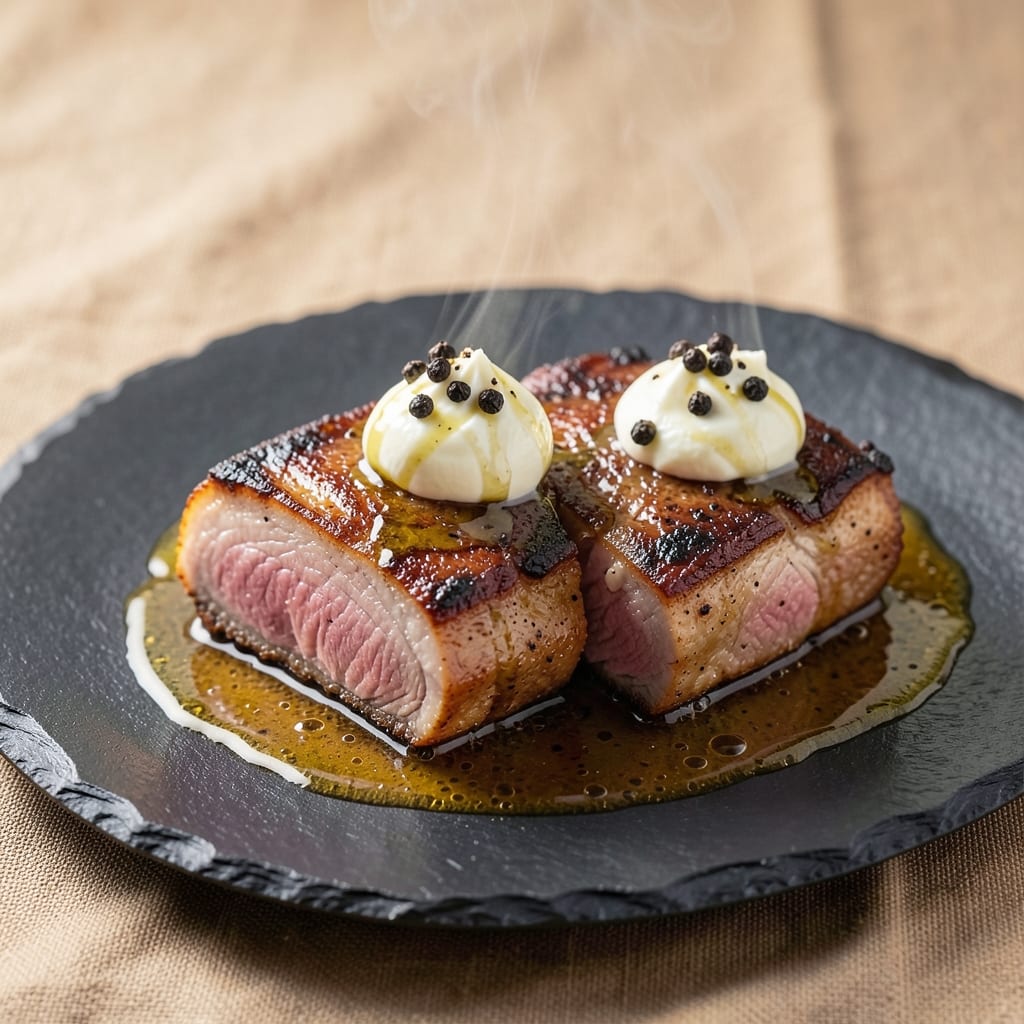
This frozen pork chops pressure cooker recipe delivers restaurant-quality results without thawing or waiting—just 30 minutes from freezer to table. 🔥 The secret lies in apple cider's sweet-tangy magic and a pan-sear finish that creates crispy edges while keeping the meat perfectly tender inside. I've been perfecting this technique for years, especially for those busy weeknights when time is tight but flavor can't be compromised.
The beauty of pressure cooking frozen pork chops is the precision—no more guessing about doneness or worrying about dry meat. We'll start with a simple seasoning blend that lets the apple cider shine, then lock everything in the pressure cooker for a quick cook. The real magic happens in the final pan-sear where those chops develop that irresistible crust while staying juicy through and through.
What you'll end up with is pork chops that are crispy on the outside, tender on the inside, and infused with warm apple cider notes that balance perfectly with the savory seasoning. This method transforms what would normally be a time-consuming meal into something you can have ready while you're still deciding what to watch on TV.
Perfect for family dinners, game day gatherings, or when you simply want to impress without spending hours in the kitchen. The same technique works beautifully with other cuts too—just adjust the cooking time slightly. Let's get started on creating pork chops that taste like they came from your favorite restaurant.
Ingredients for frozen pork chops pressure cooker
Pantry staples plus a few specialty items for restaurant-quality pork chops from frozen.
| Ingredient | Amount | Notes |
|---|---|---|
| Bone-In Pork Chops 🥓 | 1 ½ lb | Frozen, 1-inch thick, bone-in preferred |
| Apple Cider 🍎 | 1 cup | Unfiltered, preferably local |
| Butter 🧈 | 3 tbsp | Unsalted, cold for pan-sear |
| Olive Oil 🫒 | 1 tbsp | For pressure cooker seal |
| Salt 🧂 | 1 ½ tsp | Kosher or sea salt |
| Black Pepper 🌶️ | ½ tsp | Freshly ground |
| Garlic Powder 🧄 | ½ tsp | For seasoning blend |
| Onion Powder 🧅 | ½ tsp | For depth of flavor |
| Brown Sugar 🍚 | 1 tbsp | Enhances apple cider sweetness |
| Fresh Thyme Leaves 🌿 | ¼ tsp | Or 1/8 tsp dried thyme |
| Lemon Juice 🍋 | 1 tbsp | Brightens final flavor |
| Water 💧 | 1 cup | For pressure cooker base |
| All-Purpose Flour 🌾 | 2 tbsp | For dredging before pan-sear |
The pork chops are the star—bone-in cuts stay juicier, but boneless works too. I grab mine from the freezer section at Costco when they're on sale, but any grocery store's frozen pork chops will do. Look for 1-inch thickness—thinner chops cook faster and can dry out. The apple cider? Local, unfiltered brands have the best flavor, but anything labeled '100% juice' works. If you can't find it, substitute apple juice plus 1/2 tsp cinnamon—it's not identical, but close enough for weeknight dinners. Thyme is optional but adds that subtle herbal note that makes it feel special.
No apple cider? Cranberry juice mixed with apple juice works in a pinch—just reduce the sugar to 1/2 tbsp. Fresh thyme out of season? Dried thyme at one-third the amount (so about 1/8 tsp) gets you close. For the pan-sear, butter and olive oil combo is key—don't skip the olive oil or the butter won't brown properly. The flour dredge? Skip it if you're gluten-free, but trust me on the crispy edges it creates. And if you're worried about the pork being too lean, add 1 tbsp chicken broth to the pressure cooker for extra moisture.
Keep your frozen pork chops in their original packaging until ready to use—no need to transfer until you're cooking. The apple cider and butter can stay at room temp for up to 2 weeks, but once opened, store them in the fridge. These chops reheat beautifully—5 minutes in a 350°F oven brings them back to perfection. I always make a double batch and freeze half for those nights when I'm too tired to cook. Just thaw in the fridge overnight before reheating.
Why You'll Love This Recipe
- No Thaw Needed: I swear by this trick—just toss those frozen bone-ins straight into the pressure cooker. The apple cider melts into a glossy, tangy sauce while the chops cook through tender, no waiting around.
- Cider Magic: That apple cider isn’t just for drinking—it transforms into a rich, caramelized glaze that clings to the meat. Butter and olive oil seal in the juices, so you get that crispy edge with a melt-in-your-mouth center.
- Weeknight Hero: Between us, this is my secret weapon for busy nights. Serve it with mashed potatoes or crusty bread, and suddenly you’ve got a meal that feels fancy but took less time than ordering takeout.
- Budget-Friendly Feast: Bone-ins are cheaper than cutlets, and frozen means no waste. A single batch feeds four, and leftovers reheat beautifully—either crisped in a pan or tossed into a quick stir-fry the next day.
Step-by-step instructions for pressure cooker apple cider pork chops
Here's how to transform frozen pork chops into restaurant-quality cuts with crispy edges and tender centers.
👨🍳 Step 1: Season and Dredge the Frozen Pork Chops
First, place the 1.5 lb bone-in pork chops in a shallow dish. In a small bowl, mix together the 1.5 tsp salt, 0.5 tsp black pepper, 0.5 tsp garlic powder, 0.5 tsp onion powder, and 1 tbsp brown sugar. Sprinkle this seasoning blend evenly over both sides of each chops.
Next, pour the 2 tbsp all-purpose flour onto a plate. Lightly dredge each seasoned pork chop in the flour, shaking off any excess. The flour creates a light crust that helps develop that beautiful pan-sear. Don't press too hard—just a light coating works best. I like to do this step right before cooking to prevent the flour from getting soggy.
🔥 Step 2: Pan-Sear for Maximum Crispiness
Heat a large skillet over medium-high heat until hot. Add 3 tbsp cold butter and let it melt completely. The butter should foam and then settle into a smooth, bubbling liquid. Add the dredged pork chops and cook for 2-3 minutes per side until they develop a deep golden brown crust.
Here's the thing—don't walk away. You want that crust to form quickly before the butter burns. If the butter starts to brown too quickly, reduce the heat slightly. The chops are ready to flip when they release easily from the pan. Transfer the seared chops to a plate and set aside.
🍳 Step 3: Prepare the Pressure Cooker Base
In the same skillet (no need to clean it—the browned bits add flavor), add 1 tbsp olive oil over medium heat. Pour in the 1 cup apple cider and scrape up all those delicious browned bits from the bottom of the pan. Let this simmer for 2-3 minutes until reduced by about half and slightly thickened.
Transfer this apple cider mixture to your pressure cooker. Add the 1 cup water, 1 tbsp lemon juice, and 0.25 tsp fresh thyme leaves. Stir everything together—this liquid will become your flavorful cooking base. Place the seared pork chops in the pressure cooker, bone-side down if possible, and arrange them in a single layer.
⏰ Step 4: Pressure Cook to Juicy Perfection
Secure the lid on your pressure cooker and set it to high pressure. Cook for 12 minutes—this time ensures the pork chops cook through completely while staying tender. When the cooking time is complete, allow the pressure to release naturally for 10 minutes before quick-releasing any remaining pressure.
Here's why this timing matters: The natural release helps the juices redistribute throughout the meat, keeping it moist. If you quick-release immediately, you risk drying out the pork chops. Once the pressure is fully released, carefully remove the lid and let the pork chops rest for 5 minutes before serving.
🍽️ Step 5: Serve with Pan-Sear Crisp and Apple Cider Glaze
Using tongs, transfer the pork chops to a serving platter. The meat should be fork-tender with a beautiful pink center. Spoon the apple cider cooking liquid over the top—this creates a delicious glaze that ties all the flavors together. The pork chops should have that perfect combination of crispy edges from the pan-sear and tender, juicy meat.
For an extra touch, garnish with additional fresh thyme leaves. Serve immediately with your favorite sides like roasted potatoes or steamed green beans. The apple cider adds a wonderful sweet-tangy note that complements the savory pork beautifully. Each bite delivers that perfect balance of textures and flavors!
Pro Tips For Making Frozen Pork Chops Pressure Cooker
- THAW THEM FIRST: Frozen pork chops straight from the freezer? Bad idea. Even in a pressure cooker, they won’t cook evenly and risk turning rubbery. Toss them in cold water for 10-15 minutes—just enough to soften the edges—then pat very dry before searing. Wet chops steam instead of brown, and nobody wants sad, pale pork.
- SEAR BEFORE PRESSURIZING: Skip the direct dump-and-cook approach. After thawing, hit those chops with olive oil and salt in a cold pan, then crank the heat to medium-high until deep golden crust forms—about 3-4 minutes per side. The Maillard reaction here makes all the difference; pressure cooking alone won’t replicate that flavor punch.
- USE FULL-FAT CIDER: Store-bought apple cider vinegar or low-fat versions? Don’t bother. The fat in full-fat apple cider (or even a splash of heavy cream) keeps the sauce rich and prevents it from turning into glue. I learned this the hard way—my first batch tasted like watered-down apple juice. A 1:1 ratio of cider to butter works best.
- DON’T OVERLOAD THE POT: Two chops max in a 6-quart pressure cooker. Crowding them means they’ll steam instead of caramelize, and the butter will pool at the bottom like a sad, greasy puddle. If you’re cooking more, work in batches—trust me, your pork chops (and your sanity) will thank you. Tight spaces = uneven doneness.
Essential equipment for perfect results
Pressure Cooker Must-Haves
You don't need a fancy pressure cooker—just a reliable model with good temperature control. I swear by my Instant Pot Duo Crisp for this recipe because it handles both pressure cooking and pan-searing in one pot. The 10-inch pot size fits our pork chops comfortably, and the steam release function makes crisping the edges effortless. For budget-friendly options, the Ninja Foodi Digital Pressure Cooker works just as well and includes a trivet for even cooking. 🔥
Skillet Essentials
A heavy-bottomed skillet is non-negotiable for that perfect pan-sear. I use my Lodge 10.5-inch cast iron skillet—it retains heat beautifully and develops a natural crust over time. If you don't have cast iron, a stainless steel skillet like All-Clad Stainless works too, but you'll need to monitor the heat more closely to prevent hot spots. The key is getting that skillet screaming hot before adding the butter—this creates the Maillard reaction that gives your chops that golden crust. 💡
Seasoning Tools
Keep your seasonings fresh and ready to go with these simple tools. A small mixing bowl and a fine-mesh strainer make it easy to combine and distribute your seasoning blend evenly. For measuring, I rely on my OXO Good Grips measuring spoons—they're durable and accurate. A spice grinder keeps your pepper and garlic powder fresh, and a small whisk helps blend any dry ingredients smoothly. Don't forget a pair of tongs for flipping those chops without losing your grip. ✨
Safety Gear
Pressure cooking is safe when you're prepared. Always use heat-resistant oven mitts when handling the pressure cooker lid—trust me, the steam is no joke. A kitchen timer (preferably one with a loud alarm) ensures you don't overcook. I also keep a small bowl of ice water nearby for any minor burns. For extra peace of mind, consider a pressure cooker with automatic pressure release—it takes the guesswork out of timing. Safety first, flavor second! 💪
Optional Upgrades
Want to take your pork chops to the next level? A meat thermometer like the Thermoworks Smoke lets you check internal temps for perfect doneness. For presentation, a serving platter with ridges helps drain excess liquid while keeping chops elevated. If you love apple cider flavors, a mini immersion blender lets you puree the cooking liquid into a silky glaze for drizzling. And for those who love crispy textures, a second skillet lets you pan-sear while keeping the pressure cooker sealed. 🌟
Nutrition facts
Frequently asked questions
Why does this recipe work with frozen pork chops?
The pressure cooker's sealed environment creates intense heat and steam that penetrates frozen meat evenly. The 12-minute high-pressure cook ensures the chops reach 145°F internally while preventing moisture loss. The pan-sear before pressure cooking creates a barrier that locks in juices during cooking.
Can I use boneless pork chops instead?
Boneless chops will cook slightly faster (10 minutes instead of 12 minutes) since they're thinner. Just reduce the cooking time by 2 minutes and check for doneness with a meat thermometer (145°F). The apple cider glaze still works beautifully with boneless cuts.
What if my pressure cooker doesn't have a pan-sear function?
No problem! After pressure cooking, transfer chops to a hot skillet with 1 tbsp butter and 1 tbsp olive oil for 1-2 minutes per side to create crispy edges. This two-step method still delivers restaurant-quality results. The key is getting the skillet very hot before adding the chops.
How do I know when the pork chops are fully cooked?
Use a meat thermometer to check for 145°F in the thickest part of the chop. If you don't have one, look for a fork-tender texture with no pink center. The natural pressure release helps redistribute juices, so the chops should be moist even without a thermometer.
Can I make this recipe with thicker chops?
For chops over 1.5 inches thick, increase cooking time by 1-2 minutes and check for doneness. Thicker cuts benefit from the natural release—don't quick-release immediately. The apple cider helps tenderize, but always prioritize the 145°F internal temperature for safety.