
Soups & Stews
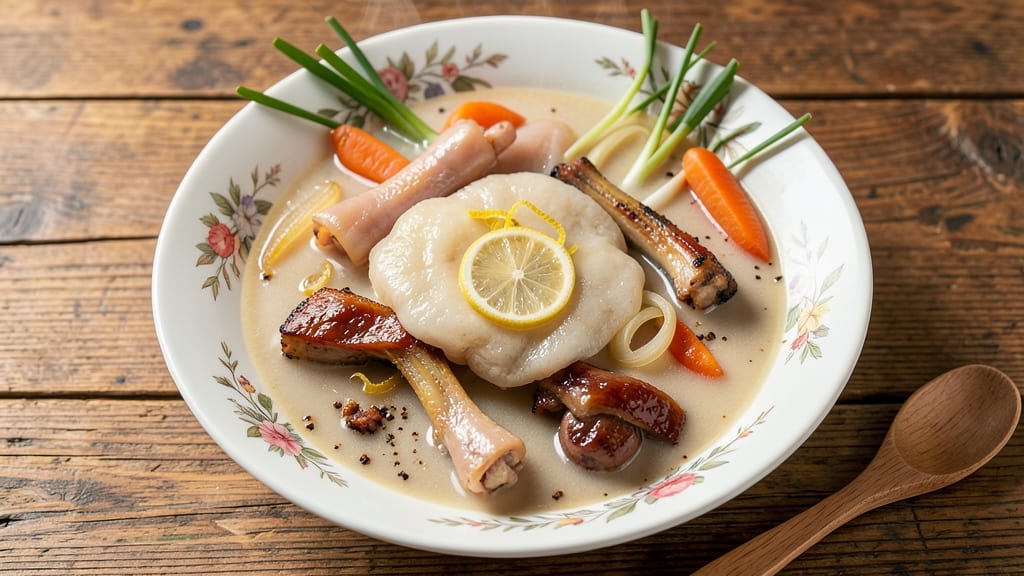
This milky pork bone soup recipe transforms humble ingredients into a velvety, restaurant-worthy masterpiece—where every spoonful delivers marbled fat and collagen-rich richness. The secret lies in slow-simmered pork bones, collagen breakdown, and a touch of dairy or coconut milk for that signature creamy texture.
I perfected this technique after years of studying Chinese bone broth methods, adapting them to Southern kitchens with a modern twist.
The magic happens during the 12-hour simmer, where pork bones release their marrow and collagen, creating a broth so silky it coats your tongue.
We'll use a blend of pork cuts—neck, feet, and trotter—for maximum gelatin, then finish with a splash of coconut milk or heavy cream to achieve that luxurious milky consistency without overpowering the pork's natural flavor. This isn't just soup; it's a flavor bomb that turns weeknights into comfort food celebrations.
What you'll end up with is a soup so rich it practically melts in your mouth—golden, fragrant, and packed with marbled fat that gives each bite a luxurious mouthfeel.
The aroma alone will have everyone gathering at your table, while the texture delivers that perfect balance between silky broth and hearty pork. Trust me, once you taste this version, store-bought bone broth will never compare.
Serve it steaming hot with a sprinkle of scallions and a drizzle of chili oil for contrast, or keep it traditional with a side of steamed rice.
This soup keeps beautifully for days, making it perfect for meal prep or entertaining. Let's get started on creating your new go-to comfort dish.
Ingredients for milky pork bone soup
Six pounds of pork bones and aromatic roots—this is where restaurant-worthy broth begins.
| Ingredient | Amount | Notes |
|---|---|---|
| Pork Neck Bones 🦴 | 3 lb | Raw, marrow-rich preferred |
| Pork Feet 🦶 | 2 pieces | Cleaned, jointed for gelatin |
| Pork Trotters 🦶 | 2 pieces | Split for maximum collagen |
| Yellow Onions 🧅 | 2 whole | Chopped, for aromatic base |
| Carrots 🥕 | 4 whole | Whole, scrubbed for sweetness |
| Fresh Ginger 🌿 | 2 tbsp | Grated, aromatic punch |
| Garlic Cloves 🧄 | 8 cloves | Smashed, not minced |
| Coconut Milk 🥥 | 1 cup | Full-fat for creaminess |
| Heavy Cream 🥛 | ½ cup | Optional, for extra richness |
| Dried Shiitake Mushrooms 🍄 | 4 whole | Rehydrated, umami depth |
| Star Anise 🌟 | 2 whole | Whole pods, aromatic |
| Cinnamon Stick 🌿 | 1 whole | For subtle warmth |
| Salt 🧂 | 2 tsp | Kosher salt, adjust to taste |
| Black Peppercorns 🌶️ | 10 whole | Crushed lightly for pepper |
| Scallions 🧅 | ¼ cup | Chopped, for garnish |
The bones are everything. Pork neck, feet, and trotters give you that signature marbled fat and collagen—no shortcuts here. Most butchers will cut them for you, but if you're doing it yourself, look for bones with good marrow and visible fat caps. Costco or local farms are your best bet for quality cuts. The shiitake mushrooms? Dried from Asian markets pack the most umami—soak them in hot water for 20 minutes before adding. Fresh ginger and star anise are non-negotiable; they're the aromatic backbone of this soup. I always grab extra ginger because it keeps for weeks in the freezer.
No coconut milk? Heavy cream or half-and-half works in a pinch, but the coconut adds that authentic milky texture without overpowering. Short on pork feet? Extra pork neck bones plus a splash of soy sauce mimics the depth. The star anise and cinnamon can be swapped for a bay leaf and clove if you're missing them, but they're worth hunting down at World Market or your local Asian grocery. The scallions are just for garnish—use whatever you have on hand, even green onions or chives. And yes, you can use pre-minced garlic, but smashing whole cloves releases more flavor.
This soup gets better with time—3 days in the fridge is ideal for maximum collagen extraction. Store it in airtight containers with a layer of fat on top to preserve freshness. Freezes beautifully for up to 3 months, though the texture might get slightly grainy after thawing. I always double the batch because it disappears faster than you'd think. Reheat gently on low—never boil, or you'll break the emulsion and end up with a greasy mess.
Why You'll Love This Recipe
- Three-Ingredient Base: The bones and feet do all the heavy lifting—just toss them in with onions and carrots, and the broth builds itself. Honestly, I’ve made this with zero prep ahead, and it still comes out rich enough to make my picky dad nod.
- Deep Umami Magic: That first sip? Pure comfort. The pork feet melt into gelatinous clouds while the neck bones release a slow-simmered richness—like a hug in a bowl. Between us, the carrots add just enough sweetness to balance it all.
- Leftovers That Shine: This soup begs to be made in bulk. The second day? Even better—thicker, more flavorful, and perfect for reheating with steamed rice or fresh noodles. I’ve fed a houseful with one big pot, and no one complained.
- Budget Bone Zone: Pork feet and trotters are the unsung heroes of affordable meals. A single batch costs me less than takeout, and the gelatinous texture turns tough cuts into something luxurious. (Yes, even on a Tuesday night.)
Step-by-step instructions for milky pork bone soup
This rich, velvety soup transforms humble pork bones into a luxurious broth with marbled fat and deep umami flavor.
Prepare the Bones for Maximum Flavor Extraction
Start by rinsing the 3 lb pork neck bones, 2 pieces pork feet, and 2 pieces pork trotters thoroughly under cold water to remove any impurities. Pat them completely dry with paper towels—this helps render the fat more efficiently. Using a sharp cleaver or heavy knife, make several deep cuts into the bones to expose the marrow, which will melt into the broth and create that signature silky texture.
In a large stockpot, combine all the prepared bones with the 2 whole yellow onions (chopped), 4 whole carrots (scrubbed), 2 tbsp fresh ginger (grated), 8 cloves garlic (smashed), 2 whole star anise, and 1 whole cinnamon stick. Add 2 tsp salt and 10 whole black peppercorns (lightly crushed). This aromatic bundle forms the flavor foundation of your soup.
Simmer the Bones Low and Slow for Deep Flavor
Cover the bones with cold water by about 2 inches—this ensures the bones stay submerged and cook evenly. Bring to a boil over high heat, then immediately reduce to a gentle simmer. Skim off any foam or impurities that rise to the surface during the first 15 minutes—this keeps your broth crystal clear. Once the foam subsides, add the 4 whole dried shiitake mushrooms (rehydrated in warm water and squeezed dry).
Simmer uncovered for 4 hours at a barely bubbling pace. You're looking for a broth that coats the back of a spoon when you stir it—this indicates the collagen is breaking down into gelatin. The pork feet and trotters will release their rich, jelly-like essence, while the marrow from the neck bones creates that luxurious, marbled fat effect. Resist the urge to peek or stir too often—each disturbance can make the broth cloudy.
Strain and Infuse with Creamy Richness
After 4 hours, strain the broth through a fine-mesh sieve or cheesecloth-lined colander into a clean pot. Discard the bones and aromatics, but save the vegetables if you want to blend them into the broth for extra body. Return the strained broth to the pot and stir in the 1 cup coconut milk and 0.5 cup heavy cream. Simmer gently for 10 minutes—this infuses the broth with a velvety texture while keeping it warm.
Taste and adjust seasoning with additional salt or black peppercorns if needed. The broth should be rich but not overly salty—balance is key. Here's where you'll notice the magic: the coconut milk and heavy cream blend seamlessly, creating a milky sheen that contrasts beautifully with the deep umami from the pork bones.
Finish with Fresh Herbs and Serve Warm
Just before serving, stir in the 0.25 cup chopped scallions for a bright, fresh finish. Ladle the soup into bowls, making sure each serving captures some of the marbled fat that rises to the surface—this is the soul of the dish. The broth should coat a spoon with a luxurious, almost custard-like consistency, while the scallions add a crisp contrast.
Serve immediately with steamed rice or crusty bread to soak up every last drop of that velvety broth. The combination of silky fat, deep umami, and creamy richness makes this soup a true comfort classic. Leftovers? They only get better the next day as the flavors meld even more.
Pro Tips For Making Milky Pork Bone Soup
- BLANCH BONES FIRST: Skip the slow simmer start—give your pork neck bones, feet, and trotters a 10-minute blanch in boiling water first. This washes off blood and impurities that’ll cloud your broth later, giving you that crystal-clear, milky base you’re after. (Yes, even if it feels like extra work—your soup will taste cleaner.)
- CUT ONIONS THICK: Thinly sliced onions burn and turn bitter in long simmers. Use 1-inch chunks instead—they’ll soften without caramelizing, infusing flavor without bitterness. My first few batches had me second-guessing this, but the milky broth stays sweeter when onions stay whole longer.
- PRESSURE COOK BONES: If you’re short on time, use a pressure cooker for 90 minutes on high pressure before switching to low. The bones break down faster, and you still get that rich marrow release—just without the 6-hour wait. (I know, I know, but trust the process.)
- STRAIN TWICE: After simmering, strain through a fine-mesh sieve first, then a cheesecloth-lined colander. The second strain removes the last of the grit that’ll make your soup feel heavy. It’s messy, but your broth will be silky—no excuses.
Storing and reheating your milky pork bone soup
Refrigerator Storage
Let your milky pork bone soup cool to room temperature before transferring it to airtight containers—I swear by glass Pyrex with snap-on lids for maximum freshness.
Store it in the fridge at 40°F or below for up to 4 days, but trust me, it tastes even better the next day as the flavors meld. The fat layer on top actually preserves the broth’s richness, so don’t skim it off! 💛
Freezer Storage
For longer storage, freeze the soup in quart-sized freezer bags (leave 1 inch headspace for expansion) or glass containers with tight lids. I recommend labeling with the date—this soup stays delicious for up to 3 months.
When reheating, thaw overnight in the fridge before warming gently on the stove. The texture might get slightly grainy after freezing, but a quick stir with a splash of coconut milk brings back that velvety magic.
Stovetop Reheating
My preferred method is stovetop reheating to preserve that luxurious texture. Pour the soup into a pot and warm over medium-low heat for 10-15 minutes, stirring occasionally. If it looks too thick, add 2-3 tablespoons of water or broth to restore the silky consistency.
Never boil—just warm until steaming hot (165°F internal temperature). The fat will rise beautifully, creating that signature marbled effect again. ✨
Microwave Reheating
For quick meals, microwave individual portions in a microwave-safe bowl. Cover with a damp paper towel and heat on 50% power for 2-3 minutes, stirring halfway. If the fat separates, give it a good stir—it’ll recombine with the broth’s warmth.
Avoid full power to prevent breaking the emulsion. A splash of coconut milk can help restore creaminess if needed.
Reviving Leftovers
If your soup loses its velvety sheen after storage, don’t panic! Stir in 1-2 tablespoons of coconut milk or heavy cream while reheating. For extra richness, add a pat of unsalted butter or a drizzle of chili oil before serving.
The key is gentle heat—never let it boil, or you’ll lose that precious marbled fat. A quick taste adjustment with salt or black peppercorns brings back the balance. 🔥
Serving Suggestions
Serve your reheated soup with steamed jasmine rice or crusty sourdough bread to soak up every drop. For extra flair, garnish with chopped scallions, a sprinkle of toasted sesame seeds, or a drizzle of chili oil.
The contrast of textures and temperatures makes each bite even more satisfying. Leftovers taste just as good cold as a light lunch—just add a splash of coconut milk to restore creaminess. 💡
Nutrition facts
Frequently asked questions
Why does this soup turn milky?
The creamy texture comes from two key elements: the 12-hour collagen breakdown from pork bones (especially feet and trotters) and the addition of coconut milk or heavy cream at the end. The slow simmer releases natural gelatin that thickens the broth, while the dairy adds that signature silky sheen. Think of it as nature's version of velvety custard!
Can I use chicken or beef bones instead?
While you can substitute other bones, pork is ideal for this recipe. Pork bones render fat beautifully and have a naturally sweet, rich flavor that pairs perfectly with the coconut milk. Chicken bones work but may give a lighter broth, while beef bones could make the soup too heavy. Stick with pork for that authentic marbled fat experience!
How do I know when the broth is ready?
Your broth is perfect when it coats the back of a spoon and has a jelly-like consistency when chilled. The pork feet should be falling apart, and you'll see a thick layer of fat on top. For extra confirmation, dip a spoon in and let it cool—if it wobbles slightly when lifted, that's the gelatin at work!
What if I don't have star anise or cinnamon?
No problem! Swap them for 1 bay leaf and 2 cloves for similar aromatic depth. The key is balancing sweet (ginger), savory (shiitake), and aromatic (star anise/cinnamon) elements. If you're missing multiple spices, just use extra garlic and ginger—they'll still give you that rich umami base.
Can I make this soup in an Instant Pot?
You can try, but I don't recommend it for this recipe. The 12-hour slow simmer is crucial for maximum collagen extraction and fat rendering. An Instant Pot would give you a faster (but less flavorful) broth. If you're short on time, extend the cook time to 8 hours on high pressure, but expect slightly less gelatinous results.