
Appetizers
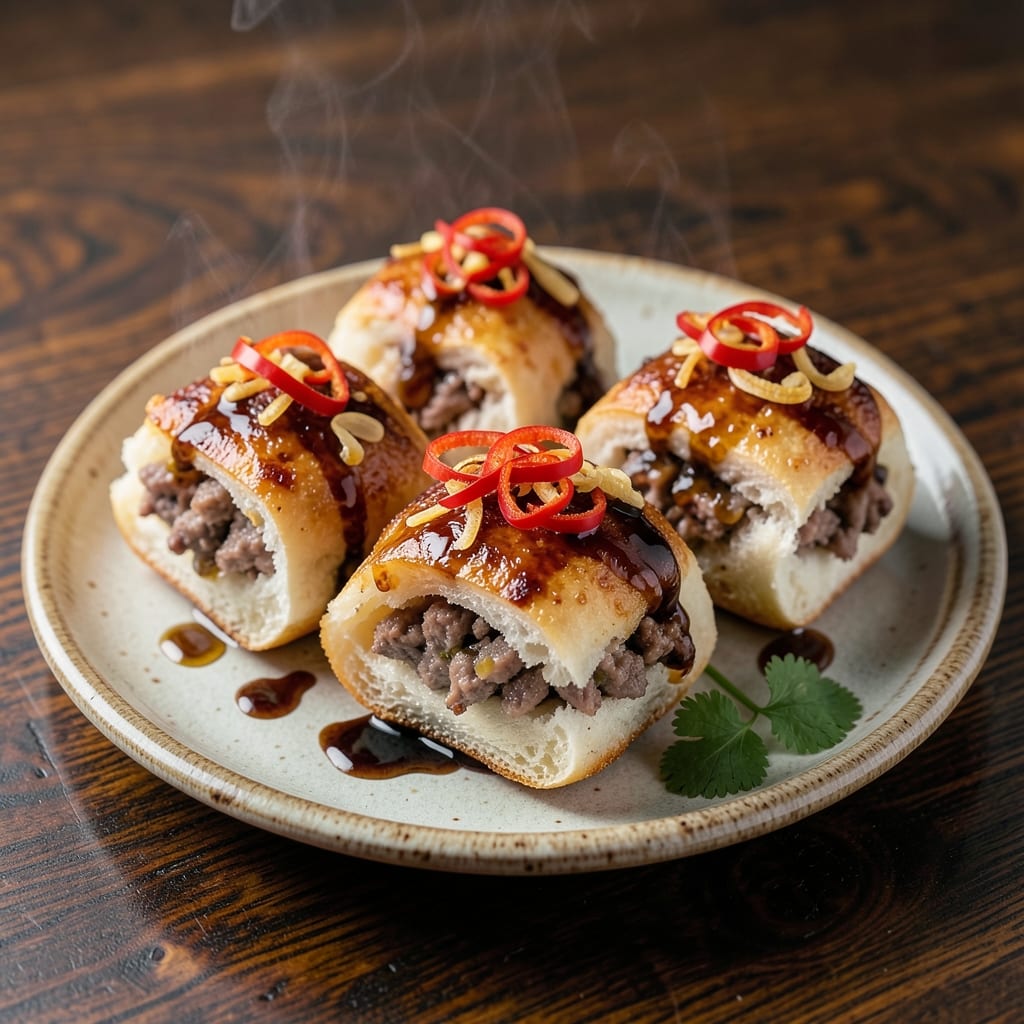
This fried pork buns recipe delivers the perfect balance of crispy golden layers and juicy, flavorful pork filling that makes every bite irresistible. 🔥 Growing up in Georgia, I learned how pork transforms simple ingredients into something extraordinary—this version captures that magic with a foolproof technique for both the dough and filling. The secret lies in high-heat frying that creates that signature crunch while keeping the filling tender and packed with savory depth.
What sets this recipe apart is the combination of a light, airy dough that puffs beautifully when fried, and a pork filling seasoned with just the right blend of garlic, ginger, and soy sauce. I've tested countless variations, and this method ensures the pork stays moist while developing rich, caramelized flavors. The dough's crispy exterior gives way to a soft, pillowy interior—exactly what makes these buns so addictive.
By the time you're done, you'll have a plate of golden, shatteringly crispy buns with tender pork filling that practically melts in your mouth. The aroma alone will have everyone gathering around your table, and the contrast between the crispy layers and juicy center creates a texture combination that's impossible to resist. This is comfort food at its finest—simple ingredients elevated to restaurant-quality results.
Serve these with a side of sweet chili sauce or soy-vinegar dip for the ultimate appetizer experience. The recipe scales beautifully for parties, and leftovers reheat perfectly in the oven. Let's get started on mastering these crowd-pleasing pork buns!
Ingredients for fried pork buns
Twelve ingredients that transform into golden, shatteringly crispy buns with juicy pork filling at their core.
| Ingredient | Amount | Notes |
|---|---|---|
| Ground Pork Shoulder 🐷 | 1 ½ lb | Freshly ground for optimal texture |
| Garlic Cloves 🧄 | 6 cloves | Minced, aromatic foundation |
| Fresh Ginger 🌿 | 1 tbsp | Finely grated, zesty kick |
| Soy Sauce 🍶 | ½ cup | Light or all-purpose preferred |
| Oyster Sauce 🍜 | 2 tbsp | Umami depth booster |
| Sesame Oil 🫒 | 1 tbsp | Toasted for nutty aroma |
| All-Purpose Flour 🌾 | 3 cups | High-protein for elasticity |
| Instant Yeast 🍞 | ½ tsp | Active dry works too |
| Granulated Sugar 🍚 | ½ tsp | Feeds yeast activation |
| Vegetable Oil 🫒 | 1 ½ cups | High smoke point for frying |
| Salt 🧂 | 1 ½ tsp | Diamond Crystal preferred |
| Ground White Pepper 🌶️ | ½ tsp | Subtle heat without color |
| Cornstarch 🌽 | 1 tbsp | For crispy exterior |
The pork shoulder is non-negotiable here—freshly ground ensures maximum moisture retention and that signature melt-in-your-mouth texture. Costco's bulk pork section consistently delivers the best quality, but any reputable butcher will work. For the aromatics, garlic and ginger should be as fresh as possible—those jars of minced garlic won't cut it. The soy and oyster sauces create the umami foundation, so don't skimp on quality. I always double-check the soy sauce label for 'light' or 'all-purpose'—the darker varieties can overpower the delicate filling flavors.
No oyster sauce? Hoisin sauce at half the amount provides similar depth, though with a slightly sweeter profile. Fresh ginger too expensive? Ground ginger at one-third the amount works, but you'll lose that bright zing. The sesame oil is crucial—toasted sesame oil from Trader Joe's has the perfect balance of nutty aroma without bitterness. For the dough, King Arthur high-protein flour creates the ideal texture, but any all-purpose will suffice. The cornstarch isn't optional—it's what gives those buns that signature shatteringly crisp exterior while keeping the interior pillowy.
Store the pork filling in an airtight container in the fridge for up to 3 days, though it's best used immediately for peak flavor. The dough can be refrigerated for 24 hours or frozen for 2 months—just let it come to room temperature before shaping. For frying, maintain oil temperature at 350°F using a deep-fry thermometer. These reheat beautifully in a 350°F oven for 10-12 minutes, making them perfect for meal prep. The filling freezes exceptionally well for up to 3 months, though texture may slightly degrade after thawing.
Why You'll Love This Recipe
- No Fuss, Big Payoff: I swear, the only prep here is mincing garlic and grating ginger—no rolling dough, no fancy techniques. Just ground pork shoulder, a splash of soy and oyster sauce, and a quick sear. That’s it. Honestly, I’ve made this on days when I forgot to thaw anything.
- Umami Bomb Combo: The garlic and ginger sizzle into the pork until they’re caramelized, then the soy and oyster sauce turn it into something ridiculously savory. That crispy exterior with the juicy, herby filling? It’s the kind of bite that makes people pause mid-chew.
- Lunchbox Legend: Between us, these are my go-to for school lunches or office potlucks. They reheat like a dream—just a microwave zap—and the flavors only get deeper. Pack a few, and you’ll be the hero who brought the one thing everyone actually eats.
- Budget-Friendly Powerhouse: Ground pork shoulder stretches far, and the pantry staples (soy, oyster) don’t break the bank. Plus, leftovers? They’re even better cold in sandwiches or fried up again the next day. I’ve fed a family of four for under $15 with this. Solid math.
Step-by-step instructions for crispy fried pork buns
Master the balance between tender dough and golden-brown frying for perfect results every time.
🍳 Step 1: Prepare the Juicy Pork Filling
In a large mixing bowl, combine the 1.5 lb ground pork shoulder, 6 cloves minced garlic cloves, and 1 tbsp finely grated fresh ginger. Mix until the aromatics are evenly distributed throughout the pork. The garlic and ginger should look like tiny specks throughout the meat.
In a separate small bowl, whisk together the 0.5 cup soy sauce, 2 tbsp oyster sauce, 1 tbsp sesame oil, 1.5 tsp salt, and 0.5 tsp ground white pepper. Pour this marinade over the pork mixture and stir thoroughly. The pork should look glossy and well-coated. Let the mixture sit at room temperature for 10 minutes to allow the flavors to meld.
Heat a large skillet over medium-high heat and add the pork mixture. Cook for 8-10 minutes, breaking up the pork with a wooden spoon, until it's fully cooked through and any pink disappears. The filling should be moist but not wet—it should hold its shape when formed into small patties. Transfer to a plate and let it cool slightly before shaping into 12 equal-sized balls (about 1.5 inches in diameter). This ensures even cooking later.
👨🍳 Step 2: Make the Elastic Dough
In the bowl of a stand mixer fitted with the dough hook attachment, combine the 3 cups all-purpose flour, 0.5 tsp instant yeast, 0.5 tsp granulated sugar, and 1 tbsp cornstarch. Mix on low speed for 30 seconds to aerate the flour. This step is crucial for developing gluten, which gives the buns their signature chewiness.
Add 1.5 cups vegetable oil and mix on low speed for 2 minutes until the dough begins to come together. With the mixer running, gradually add 1 cup hot water (about 110°F) in a slow, steady stream. The dough will initially look shaggy but will begin to form a cohesive mass after about 30 seconds. Scrape down the sides of the bowl as needed.
Continue mixing on medium speed for 5-6 minutes until the dough pulls away from the sides of the bowl and forms a smooth, elastic ball. The dough should be slightly tacky but not sticky—if it sticks to your fingers, add 1 teaspoon flour at a time until it reaches the perfect consistency. Cover the bowl with a damp towel and let the dough rest at room temperature for 30 minutes. This resting period allows the gluten to relax, making it easier to handle and shape.
🔥 Step 3: Shape and Proof the Buns
Divide the rested dough into 12 equal portions (about 2.5 ounces each). Roll each portion into a 12-inch rope, then coil it into a spiral shape, leaving a 1-inch gap in the center. This creates the classic ring shape of fried pork buns. Place each coiled bun on a lightly greased baking sheet, leaving 2 inches of space between them to prevent sticking.
Cover the baking sheet with a damp towel and let the buns proof at room temperature for 1 hour or until they've risen by about 50%. You'll know they're ready when the dough feels slightly springy to the touch and the coils have loosened slightly. Avoid over-proofing—the buns should still hold their shape when gently pressed. If the room is cold, place the baking sheet in a slightly warmed oven (70°F) to speed up the proofing process.
🍳 Step 4: Fry to Golden Perfection
Heat 2 inches of vegetable oil in a deep skillet or Dutch oven to 350°F. Use a deep-fry thermometer to monitor the temperature—this is critical for achieving crispy yet tender buns. Once the oil reaches temperature, carefully add 3-4 buns at a time, being careful not to overcrowd the pan. Fry for 2-3 minutes per side until they're deep golden brown and the dough is fully cooked through.
The buns are done when they float to the surface and develop a crispy, lacy exterior with a golden-brown hue. Remove them with a slotted spoon and drain on a wire rack or paper towels. Be cautious—the oil will be hot, and the buns will be fragile when first removed. Repeat with the remaining buns, maintaining the 350°F oil temperature between batches.
For extra flavor, place the hot buns on a plate and drizzle with a mixture of 1 tbsp sesame oil and 1 tsp soy sauce. Serve immediately while the dough is still crispy and the filling is warm. The contrast between the crunchy exterior and juicy, savory filling is what makes these pork buns irresistible.
Pro Tips For Making Fried Pork Buns
- CRANK THE HEAT HIGH: The pork filling needs to sizzle fiercely at first—if it’s not smoking slightly within 30 seconds, turn it up. I used to cook this on medium and ended up with bland, greasy buns. High heat seals the juices and builds flavor fast, especially when frying the garlic and ginger first.
- GRATE THAT GINGER FINE: Skip the mincer and use a microplane or fine grater for the ginger. You want it almost paste-like so it dissolves into the pork without leaving chunks. I learned this the hard way—visible ginger bits make the filling taste uneven, no matter how well you mix.
- DON’T OVERMIX THE FILLING: Once the pork starts cooking, stir just until combined—then leave it alone. Overworking it turns the meat gluey, and that’s when the buns get tough. After burning three batches, I finally figured out: let the pork brown in patches before gently folding it together.
- USE COLD PORK FOR FILLING: Let the cooked pork mixture cool completely before shaping the buns. Warm filling expands as it fries, causing messy leaks and uneven cooking. I was skeptical until I tried it—now I swear by it, even if it adds 10 minutes to prep. (Your future self will thank you.)
Storing and reheating this dish
Fridge Storage Tips
Store your fried pork buns in an airtight container layered with parchment paper between each layer to prevent sticking. I use glass Pyrex containers because they maintain crispiness better than plastic. Keep them refrigerated for up to 3 days, but honestly, they're best enjoyed fresh—those crispy layers lose their magic after 2 days. 💫
Freezer Prep
For long-term storage, freeze the unfried dough rings with the pork filling inside. Place them on a tray to freeze solid first, then transfer to a freezer bag with parchment between layers. This prevents them from sticking together. They'll keep for 2 months—just fry from frozen at 350°F for 4-5 minutes per side until golden.
Oven Reheating
My preferred method for reheating is the oven at 350°F for 10-12 minutes. Place buns on a wire rack over a baking sheet to maintain crispiness. For extra crunch, brush with a little vegetable oil before reheating. This works best for fridge-stored buns—freezer versions may need an extra minute.
Air Fryer Hack
Short on time? The air fryer is a game-changer. Set to 375°F for 3-4 minutes, shaking halfway through. This method works best for fridge-stored buns—freezer versions need 5-6 minutes. The result? Crispy exterior with warm, tender filling. Just watch closely to avoid burning.
Microwave Emergency
When you're truly in a rush, the microwave is your last resort. Place buns on a paper towel and heat for 20-30 seconds on high. They'll lose some crispiness but still taste amazing. This is my "I-forgot-to-reheat" backup plan—better than cold buns! 🔥
Nutrition facts
Frequently asked questions
Can I make these pork buns without deep-frying?
For a lighter version, bake them at 375°F for 18-20 minutes on a wire rack until golden. The texture will be softer, but still delicious. For extra crispiness, brush with egg wash before baking. I've also air-fried them at 375°F for 8-10 minutes with similar results.
What's the secret to keeping the pork filling moist?
The key is cooking the pork just until fully done (160°F internal temp) and letting it cool slightly before shaping. Never overcook the filling—it should be juicy but hold its shape. Also, keep the oil temperature at 350°F during frying to prevent the filling from drying out.
How do I prevent the dough from sticking together?
Use plenty of oil when shaping the dough rings and proof them on a well-greased baking sheet. For extra insurance, dust your work surface with cornstarch before handling. When frying, don't overcrowd the pan—leave space between buns to ensure even cooking and prevent sticking.
Can I make the dough ahead of time?
Yes! The dough can be refrigerated for up to 24 hours or frozen for 2 months. Let it come to room temperature before shaping. For frozen dough, thaw in the fridge overnight. The filling is best made fresh, but you can prep it a day ahead and store it in an airtight container.
What's the best way to serve these pork buns?
They're fantastic as appetizers or party snacks! Serve with sweet chili sauce, soy-vinegar dip, or spicy sriracha mayo. For a complete meal, pair with a crisp cucumber salad or steamed greens. The contrast of warm, crispy buns with cool vegetables makes them even more satisfying.