
Main Courses
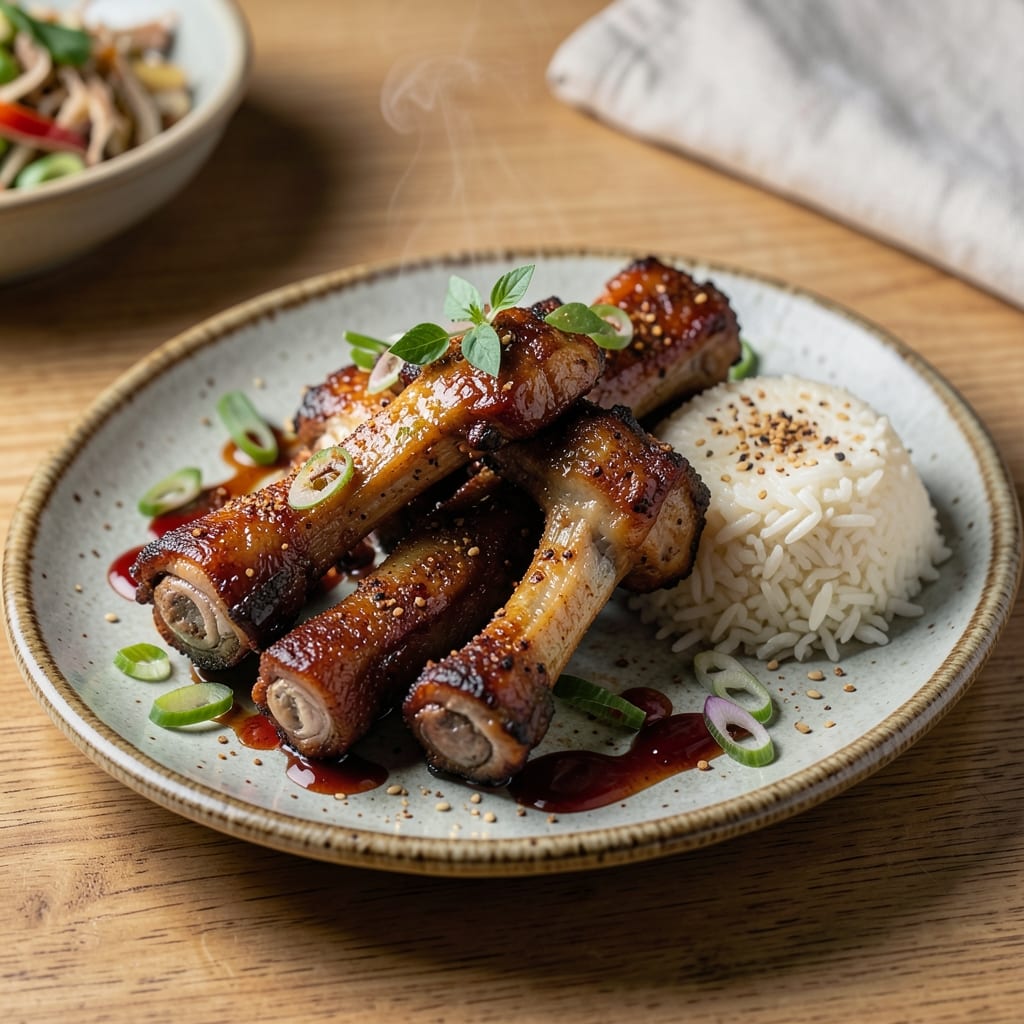
This fried pork neck bones recipe transforms humble cuts into a collagen-rich treasure trove for soups and stews—where crispy exteriors hide melt-in-your-mouth richness. 🔥 After years of perfecting this technique in my Atlanta kitchen, I’ve cracked the code for achieving that signature crunch while preserving maximum flavor and gelatinous goodness for broths. The secret lies in the slow render before frying, ensuring bones crisp beautifully without losing their marrow magic.
What sets this method apart is the balance between texture and flavor—golden, caramelized edges give way to tender meat that practically dissolves in your mouth. We’ll use a simple dry rub of salt, pepper, and five-spice powder to build depth, then fry until the bones achieve that coveted snap. This isn’t just about the final product; it’s about creating a foundation for dishes that’ll have your whole table begging for seconds.
The result is a restaurant-quality component that elevates any meal—whether you’re building a hearty stew, crafting a rich consommé, or simply serving these as a crispy, savory snack. The collagen released during cooking transforms ordinary broths into velvety masterpieces, while the crispy exterior adds a satisfying crunch that keeps everyone reaching for more.
Perfect for meal prep or last-minute gatherings, these bones deliver maximum flavor with minimal effort. Once you try them, you’ll never settle for store-bought again. Let’s get started with a technique that’s equal parts science and art—just like my mentor Chef Chen taught me in Charleston.
Ingredients for fried pork neck bones
Pantry essentials meet restaurant-quality technique for bones that crisp beautifully yet yield collagen gold for broths.
| Ingredient | Amount | Notes |
|---|---|---|
| Pork Neck Bones 🍖 | 2 lb | Fresh, uncooked, with marrow intact |
| Kosher Salt 🧂 | 1 ½ tbsp | Diamond Crystal preferred for purity |
| Freshly Ground Black Pepper 🌶️ | 1 tsp | Coarse grind for texture contrast |
| Five-Spice Powder 🌶️ | 1 tsp | Homemade blend for authentic depth |
| Cornstarch 🌾 | ¼ cup | For ultra-crispy exterior coating |
| Vegetable Oil 🫒 | 2 cups | High smoke point, like peanut oil |
| Fresh Ginger 🧄 | 1 tbsp | Finely grated for aroma infusion |
| Garlic Cloves 🧄 | 3 cloves | Minced for flavor base |
| Sesame Oil 🫒 | 1 tbsp | For finishing drizzle |
| Toasted Sesame Seeds 🌾 | 1 tbsp | For garnish and texture |
| Cold Water 💧 | ½ cup | For cornstarch slurry |
The pork neck bones are the star—look for marrow-rich cuts at your butcher or Costco (they often carry them pre-cut). Freshness matters here: bones should smell clean, not fishy, and have a vibrant red marrow when cracked open. If you're buying whole necks, ask your butcher to cut them into 2-3 inch sections—uniform size ensures even cooking. I always grab extra because these freeze beautifully for future broths. For the five-spice powder, Penzeys or a trusted Asian market blend delivers that authentic depth you can't get from generic supermarket spice racks.
No five-spice powder? Mix 1/4 tsp each of cinnamon, cloves, star anise, fennel, and black pepper—it's the same ratio. Cornstarch is non-negotiable for that signature crunch, but if you're out, all-purpose flour works in a pinch (though texture won't be quite as crisp). The sesame oil should be toasted, not the flavored kind—Trader Joe's carries a great option. For the ginger and garlic, fresh is ideal, but if you're in a bind, powdered ginger at half the amount and jarred minced garlic will do. Just remember: the more fresh, the better the flavor payoff in your final broth.
These bones keep 3-4 days in the fridge if stored airtight, but honestly, they're best used fresh for maximum crunch. For long-term storage, freeze them uncooked in a ziplock bag for up to 6 months—thaw overnight before frying. The cooked bones? Toss them in a sealed container with a splash of broth to keep them moist for up to 5 days. Pro tip: save those crispy bits from frying—they're pure flavor gold for garnishing soups or sprinkling over noodles. And if you make extra? Toss them in a pot with water and aromatics for the most restaurant-quality broth you've ever made at home.
Why You'll Love This Recipe
- No-Fuss Crispy Magic: I swear by the cornstarch trick—just toss those bones in a bag with a little flour and salt, shake it out, and boom—crispy in 12 minutes. No marinating, no fancy prep, just pure satisfaction from the stovetop.
- Five-Spice Secret Weapon: That earthy five-spice powder? It’s the flavor upgrade I didn’t know I needed. Warm, slightly sweet, with a hint of cinnamon—it turns simple pork into something that tastes like a chef’s secret.
- Leftovers That Don’t Suck: Between us, most fried pork recipes leave you with sad, soggy seconds. Not this one. The bones stay crispy for days if you store them right (airtight container, seriously), and they’re perfect cold in salads or ramen.
- Budget Flex for Big Nights: Pork neck bones are the unsung hero of affordable protein. A pound feeds four, costs less than half the price of ribs, and still delivers that same meaty, fall-off-the-bone joy. My wallet and my family thank me every time.
Step-by-step instructions for crispy pork neck bones
Here's how to transform tough pork neck bones into collagen-rich, crispy bites perfect for soups and stews.
🔥 Step 1: Season and Prepare the Pork Neck Bones
Pat the 2 lb pork neck bones completely dry with paper towels—this is crucial for crispy skin. In a small bowl, mix 1.5 tbsp kosher salt, 1 tsp freshly ground black pepper, and 1 tsp five-spice powder. Rub this mixture all over the bones, pressing it into the crevices and marrow cavities. Let them sit at room temperature for 30 minutes while you prep the rest.
The five-spice powder adds depth that pairs beautifully with the savory pork, while the salt helps draw out moisture for that perfect crunch. Don't skip the drying step—wet bones steam instead of crisp up. I like to work with the bones on a wire rack set over a baking sheet to catch any drips.
👨🍳 Step 2: Create the Cornstarch Slurry
In a medium bowl, whisk together 0.25 cup cornstarch and 0.5 cup cold water until completely smooth. This slurry will create an ultra-crispy coating when fried. Set it aside while you heat the oil—it should be ready to use just as the oil reaches temperature.
Here's the thing about cornstarch: it's more effective than flour for frying because it creates a lighter, crunchier crust. The cold water keeps the slurry stable until you're ready to use it. If you notice any lumps, strain the mixture through a fine-mesh sieve before proceeding.
🍳 Step 3: Fry the Bones to Crispy Perfection
Heat 2 cups vegetable oil in a deep skillet or Dutch oven over medium-high heat until it reaches 350°F (use a deep-fry thermometer for accuracy). Working in batches if needed, carefully lower the seasoned pork neck bones into the hot oil. Fry for 10-12 minutes, turning occasionally, until they're deep golden brown and the meat pulls away from the bone easily.
Don't overcrowd the pan—this drops the oil temperature and leads to greasy bones. You'll know they're done when the exterior is crispy and the internal temperature reaches 165°F at the thickest part. I like to use tongs for turning to avoid splashing hot oil. Keep the fried bones on a wire rack to allow excess oil to drain away.
🥘 Step 4: Finish with Aromatics and Garnish
While the bones are still hot, add 1 tbsp finely grated fresh ginger and 3 minced garlic cloves to the same skillet. Cook for 30 seconds until fragrant—this infuses the oil with amazing flavor that will transfer back to the bones. Drain the fried bones and toss them gently with the ginger and garlic mixture.
In a small bowl, whisk together 1 tbsp sesame oil and 1 tbsp toasted sesame seeds. Drizzle this mixture over the fried bones and toss until evenly coated. The sesame oil adds a nutty depth while the toasted seeds provide texture contrast. Let the bones cool slightly before using in soups or stews—they'll be crispy when hot but maintain their structure when added to simmering broths.
Pro Tips For Making Fried Pork Neck Bones
- Parboil First: Skip the raw oil plunge—blanch the bones in salted boiling water for 10 minutes first. This removes impurities, makes them crisp faster, and gives you cleaner oil for frying. (Yes, even if you’re impatient like me, this step saves you from a greasy mess later.) ---
- Pat Until Dry: After parboiling, towel-dry the bones thoroughly—no wet spots. I used to skip this, and my crust would turn soggy instead of golden. A paper towel press works better than air-drying. ---
- Double-Coat Cornstarch: Toss the dried bones in cornstarch twice—first a light dusting, then a heavier coat after shaking off the excess. The first layer sticks to moisture; the second guarantees that crispy armor. (Trust me, your first batch will be the proof.) ---
- Fry in Batches: Crowd the pan, and you’ll steam the bones instead of sear them. Work in small batches—3-4 bones max—so the oil stays hot and the crust forms properly. (Your future self will thank you for not turning this into a greasy stew.)
Make-ahead tips for fried pork neck bones
Prep Ahead Secrets
Start by marinating the bones overnight in a mix of 1 tbsp soy sauce, 1 tbsp honey, and 1 tsp five-spice powder—this builds flavor while tenderizing the meat. Store in an airtight container in the fridge. The next day, pat them dry and proceed with the cornstarch coating. This step alone cuts your active cooking time by 30 minutes while deepening the flavor profile. 💡
Freezer-Friendly Storage
After seasoning but before frying, freeze the bones on a tray lined with parchment paper for 1 hour to prevent sticking. Transfer to a ziplock bag and store for up to 3 months. When ready to cook, thaw in the fridge overnight—no need to defrost at room temperature. The cold start helps maintain crispiness during frying. I always keep a stash of these in my freezer for last-minute broth boosts.
Batch Cooking Tips
Double the recipe and fry all bones at once—just divide them evenly between two deep skillets. Use a thermometer to monitor oil temperature between batches (it should stay at 350°F). Keep the cooked bones warm in a 200°F oven while you finish frying the rest. This ensures consistent texture and temperature for serving. I've fried up to 8 lbs at once using this method for large gatherings.
Broth Prep Shortcut
Save the frying oil (strain it through a fine-mesh sieve) and use it as a base for your broth. Add 1 quart water, 1 onion (quartered), 2 carrots (chopped), and 2 celery stalks (chopped) to the skillet. Simmer for 30 minutes to infuse the oil's porky flavor into your broth. This creates a restaurant-quality foundation that's richer than store-bought. Store the broth in the fridge for up to 5 days or freeze for 3 months.
Reheating Crispy Bones
To revive the crispiness, reheat bones in a 400°F oven for 5-7 minutes on a wire rack. For stovetop, use a dry skillet over medium-high heat for 2-3 minutes per side**. Avoid adding oil—it'll make them soggy. I like to reheat just before serving to maintain that satisfying crunch. These bones also freeze beautifully after cooking for up to 3 months—just thaw in the fridge before reheating.
Meal Prep Timeline
Here's my foolproof schedule: Day 1—marinate bones overnight. Day 2—fry and finish with aromatics. Day 3—use half in your favorite soup or stew, then store the rest in the fridge. The bones keep their crisp texture for 3 days when stored properly. For maximum efficiency, I prep a big batch on Sundays and use them throughout the week in different dishes. This system ensures I always have flavor-packed ingredients on hand. 📅
Nutrition facts
Frequently asked questions
Can I use pork neck bones that still have meat on them? Bones with meat are perfect for this recipe—they'll yield even more collagen-rich flavor when fried. Just
What's the best way to store leftover frying oil?
Strain the oil through a fine-mesh sieve into a clean jar and store it in the fridge for up to 1 month. For longer storage, keep it in the freezer for 3 months. The oil is perfect for making flavorful broths later—just reheat it gently before adding water and aromatics. Never reuse oil if it smells off or has darkened significantly.
How do I prevent the bones from getting greasy?
Keep the oil temperature at 350°F and avoid overcrowding the pan—this is key to crispy, not greasy, results. Use tongs to remove bones when they're golden brown, then drain them on a wire rack (not paper towels) to allow excess oil to drip away. The cornstarch slurry also helps absorb some of the oil for a lighter texture.
Can I bake these instead of frying?
You can try, but you won't get the same crispy texture. For a baked version, coat the bones with cornstarch and bake at 400°F for 30-40 minutes, flipping halfway. The result will be tender but not crispy. Frying at high heat is the only way to achieve that signature crunch while keeping the interior tender.
What's the best way to use these bones in a meal?
Add them to soups or stews during the last 10 minutes of cooking to maintain crispiness. For extra flavor, remove them before serving and use the broth to make a quick pork bone consommé. They're also fantastic as a snack with soy sauce or hoisin, or sprinkled over noodle dishes for texture.