
Main Courses
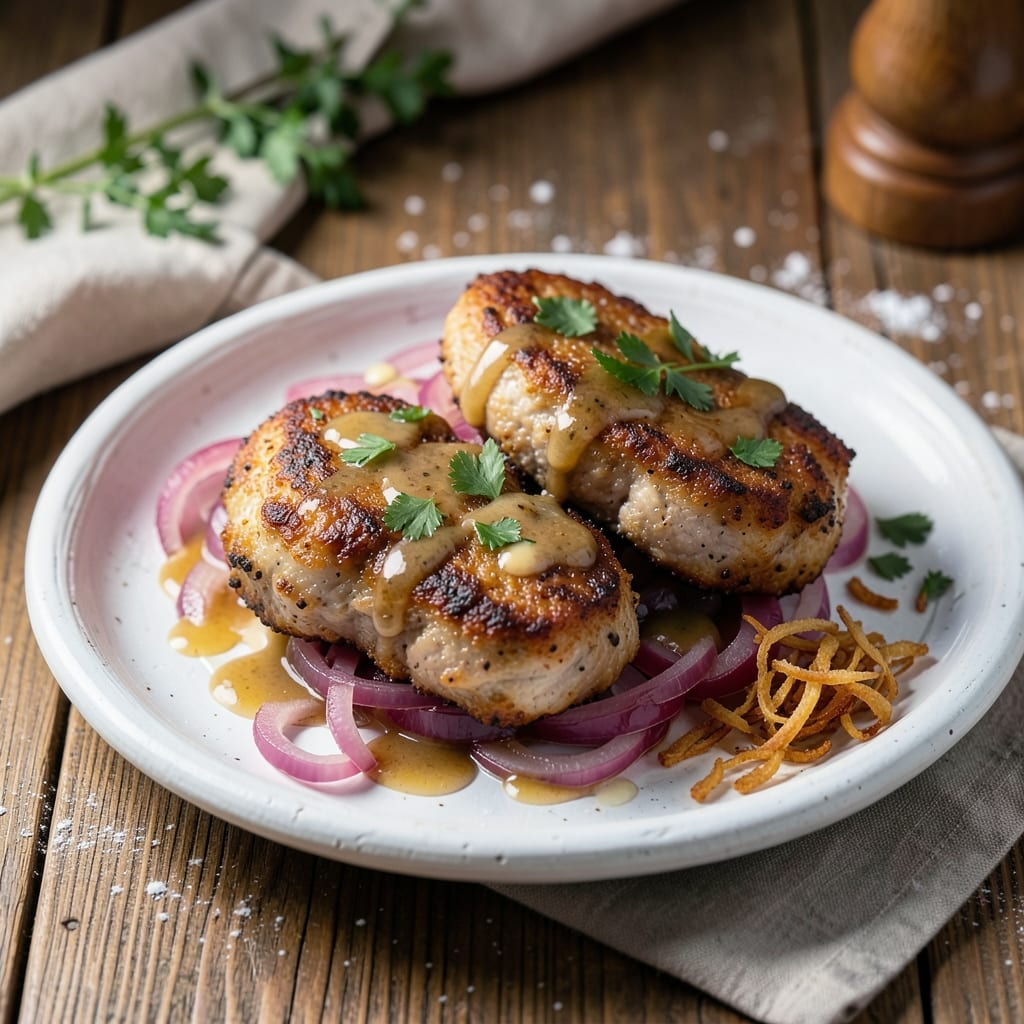
This crispy fried smothered pork chops recipe delivers the perfect balance of golden crust and tender meat, topped with rich onion gravy that transforms a simple weeknight dinner into a restaurant-worthy meal. The secret lies in a precise pan-searing technique that locks in juices while creating that coveted crust, followed by a velvety gravy made from the very drippings that elevate every bite. I developed this method during my time in Charleston, where pork chops are treated like Sunday supper—worth the extra effort for that satisfying crunch and melt-in-your-mouth texture.
The beauty of this recipe is its simplicity: just a few pantry staples and 15 minutes of active time, yet it delivers professional-level results. The pork chops cook in their own fat, creating a flavorful base for the gravy, while the onions caramelize slowly to build depth without burning. What makes this version stand out is the technique of deglazing the pan with just enough liquid to create a sauce that's rich but not heavy, clinging perfectly to each crispy chop. This is the kind of dish that tastes even better the second time around—when you've mastered the timing and temperature.
By the time you're done, you'll have perfectly crispy pork chops with golden edges and juicy centers, smothered in a glossy onion gravy that's impossible to resist. The aroma alone will have everyone gathering at the table, and the first bite delivers that satisfying contrast of textures—crunchy exterior, tender meat, and silky gravy. This recipe scales beautifully too, whether you're feeding a family or preparing for a crowd. The leftovers reheat just as well, making it a perfect make-ahead option for busy weeknights.
For those who love their pork chops extra special, I recommend serving with a side of buttery mashed potatoes or a crisp green salad to cut through the richness. The gravy also works wonders on rice or even as a dipping sauce for the chops themselves. Here's everything you need to bring this classic Southern dish to your table with confidence—just follow the steps, and you'll have dinner ready in no time.
Ingredients for fried smothered pork chops
Pantry staples plus a few key ingredients for that restaurant-worthy crunch and rich gravy.
| Ingredient | Amount | Notes |
|---|---|---|
| Bone-In Pork Chops 🥩 | 4 whole | 1-inch thick, center-cut preferred |
| All-Purpose Flour 🌾 | ½ cup | For dredging, unsifted |
| Yellow Onions 🧅 | 2 whole | Medium size, thinly sliced |
| Unsalted Butter 🧈 | ½ cup | Cold, cut into pieces |
| Vegetable Oil 🫒 | ¼ cup | For frying, high smoke point |
| Beef Broth 💧 | 1 cup | Low-sodium preferred |
| Granulated Sugar 🍚 | 1 tbsp | For caramelizing onions |
| Salt 🧂 | 1 ½ tsp | Kosher or sea salt |
| Black Pepper 🌶️ | ½ tsp | Freshly ground preferred |
| Garlic Cloves 🧄 | 2 cloves | Minced for gravy |
| All-Purpose Flour 🌾 | 1 tbsp | For thickening gravy |
| Fresh Parsley 🌿 | ¼ cup | Chopped, for garnish |
The pork chops are everything here. Bone-in, center-cut chops stay juicier than boneless—ask the butcher for 1-inch thick cuts. Costco or local butcher shops usually have the best selection, but the regular grocery store meat department works too. Look for good marbling (those little white streaks of fat) for extra flavor. If you can't find bone-in, use boneless but pound them to even thickness. The flour matters too—Gold Medal unsifted gives the best crust, but any all-purpose brand works. Pat the chops dry before dredging, or the coating won't stick right.
No beef broth? Chicken broth with a splash of soy sauce works in a pinch. The sugar in the onions is non-negotiable—it helps caramelize them for that sweet depth. Brown sugar works too if you're out of granulated. Fresh parsley is ideal for garnish, but dried parsley at one-third the amount gets you close. The butter should be cold when you cut it into pieces—take it out of the fridge 10 minutes before cooking. For the oil, vegetable or canola oil works best for high-heat searing. And if you're worried about the chops being too thick, just cook them a minute longer—they'll stay juicy.
The gravy reheats beautifully, so make extra—it's perfect over rice or mashed potatoes. Store leftovers in the fridge for 3-4 days or freeze for up to 3 months. I always portion the gravy separately so it doesn't get soggy. The pork chops stay crispy for about 2 days in the fridge if you keep them covered but not sealed—let them breathe a little. For a crowd, double the recipe—just use a larger skillet or work in batches. The secret to crispy chops? Don't overcrowd the pan!
Why You'll Love This Recipe
- No-Fuss Flour Coat: I just dredge the chops in flour and pan-fry them—no fancy batter, no waiting for breadcrumbs to stick. That golden crust happens fast, and honestly? The bone-in version stays juicy while the edges get crispy, which is basically the holy grail of pork chops.
- Onion Butter Magic: Between us, the real star is that caramelized onion butter sauce. I slice the onions thin, cook them slow in butter until they’re sweet and jammy, then smother the chops right in the pan. It’s rich, it’s savory, and it turns a simple weeknight meal into something that feels special—no fancy plating required.
- Weeknight Workhorse: This feeds four for under $15, and leftovers reheat like a dream. I’ll make a double batch on Sundays, pack half for lunches, and still have enough for dinner. (Yes, even on a Tuesday night when takeout sounds tempting.)
- Budget Crispy Perfection: Bone-in chops are cheaper than their boneless cousins, and the flour crust uses just a handful of pantry staples. I’ve made this with store-brand butter and still ended up with a dish that tastes like it belongs on a dinner table. That’s the kind of reliable, no-guilt cooking I love.
Step-by-step instructions for crispy pan-seared pork chops
Here's how to achieve that perfect golden crust and rich onion gravy every time.
Season and Dredge the Pork Chops
Start by patting the 4 whole bone-in pork chops dry with paper towels—this is crucial for that crispy crust. Place them on a clean plate and season both sides generously with 1.5 teaspoons salt and 0.5 teaspoon black pepper. I like to press the seasoning into the meat so it sticks.
In a shallow bowl or plate, combine the 0.5 cup all-purpose flour. Working with one chop at a time, dip each side into the flour, shaking off any excess. Let the chops sit for 3-5 minutes while you prepare the pan—this resting time helps the flour adhere better. Real talk: don't skip this step or your chops will stick and steam instead of sear.
Sear the Pork Chops to Golden Perfection
Heat a large skillet over medium-high heat until it's hot enough that a drop of water sizzles and evaporates instantly. Add 0.25 cup vegetable oil and 0.5 cup unsalted butter (cut into pieces), letting them melt together. You want the butter to foam but not brown—this ensures flavor without bitterness.
Working in batches if needed, carefully place the chops in the pan. I press down gently on the fillet during the first minute to prevent curling. Cook for 3-4 minutes per side until the chops are deep golden brown and the internal temperature reaches 145°F (use a meat thermometer). The crust should be crispy enough to resist with your tongs. If it sticks, don't panic—just let it cook a bit longer and it'll release.
Caramelize the Onions for Gravy
Remove the chops from the pan and set them aside on a plate, tented loosely with foil to keep warm. Reduce the heat to medium-low and add the 2 whole yellow onions (thinly sliced) and 1 tablespoon granulated sugar. Stir occasionally for 10-12 minutes until the onions are deep golden brown and sweet-smelling. This caramelization builds the flavor base for your gravy.
Add the 2 minced garlic cloves and cook for 30 seconds until fragrant—don't let it burn. Here's the thing: if your onions aren't brown enough, your gravy will taste bland. Take your time here and let them develop that rich caramel color.
Build the Rich Onion Gravy
Pour in the 1 cup beef broth, scraping up any browned bits from the bottom of the pan with a wooden spoon. Bring to a gentle simmer and let it reduce by about half, which should take 3-4 minutes. Stir in the 1 tablespoon all-purpose flour and cook for another 1-2 minutes until the gravy thickens to a smooth, velvety consistency.
Taste and adjust seasoning with more salt or black pepper if needed. The gravy should coat the back of a spoon and cling beautifully to the chops. If it's too thick, whisk in a splash of water or broth to reach your preferred consistency. This is where all those caramelized onion flavors really shine.
Serve with Gravy and Garnish
Return the chops to the pan and spoon the onion gravy generously over the top. Let them sit together for 1-2 minutes so the chops can soak up some of that rich sauce. Transfer the chops to serving plates, spooning the remaining gravy over each one.
Finish with the 0.25 cup chopped fresh parsley for a pop of color and freshness. Serve immediately with crusty bread or mashed potatoes to soak up every last bit of that delicious gravy. The contrast of crispy chops and silky gravy is what makes this dish truly special—don't skip the gravy step, even if it seems like extra work.
Pro Tips For Making Fried Smothered Pork Chops
- CRISP THE CHOPS FIRST: Bone-in pork chops are stubborn—get them searing hot in oil (350°F) for 3-4 minutes per side before adding flour. The crust forms faster this way, and the bone stays juicy instead of turning into a soggy stick. I used to rush this, and the coating would slide off like sad wallpaper.
- SLICE ONIONS THIN AND EVEN: No one likes chewing through onion chunks in smothered pork chops. Cut them paper-thin (⅛-inch or less) so they soften into the sauce instead of sitting like stubborn guests. A mandoline helps, but a sharp knife works too—just stay patient.
- DON’T SKIP THE BUTTER SWAP: After frying, replace half the oil in the pan with 2 tablespoons of cold unsalted butter. It adds richness and helps the onions caramelize better than oil alone. Sounds weird, but it works—trust me, I’ve done the math.
- LET THE SAUCE REST: After smothering, turn off the heat and let the pork chops sit under foil for 5 minutes. The residual heat finishes cooking the onions and keeps the chops from drying out. I learned this the hard way—cutting into them too soon turns them into hockey pucks.
Wine and beer pairings for these flavors
Southern Red Wine
For this rich, onion-forward dish, I always reach for a bold Southern red wine like a Georgia Cabernet Sauvignon or North Carolina Merlot. The tannins in these wines stand up to the crispy pork chops while complementing the caramelized onions. I love Chateau Des Chenes Cabernet—it has enough body to match the gravy's richness without overpowering the dish. 🍷
Crisp White Options
A dry Riesling from the Southeast works beautifully too—its bright acidity cuts through the richness of the fried chops. Look for Chateau Ste. Michelle Riesling or a local Albemarle Vineyards bottle. The slight sweetness in the wine enhances the caramelized onions without clashing. For something even lighter, a Sauvignon Blanc from Virginia adds a zesty contrast.
Beer Pairings
If you're serving with beer, I recommend a crisp American lager like Leinenkugel's Summer Shandy or Peroni. The effervescence cleanses your palate between bites of crispy pork and creamy gravy. For something heartier, a Belgian witbier—like Hoegaarden—brings citrus notes that pair wonderfully with the onions. Avoid heavy stouts or IPAs, which would dominate the dish. 🍺
Cider Alternative
Don't overlook dry hard cider as a fantastic pairing. A crisp, unsweetened cider like Angry Orchard or Strongbow complements the dish's Southern roots while balancing the richness. The slight tartness enhances the caramelized onions without competing with the pork's savory notes. It's a great option for those who prefer something lighter than wine.
Cocktail Pairing
For a festive touch, serve a Southern-style whiskey sour made with bourbon (like Buffalo Trace) and a splash of lemon juice. The citrus brightens the dish, while the whiskey's caramel notes echo the gravy's depth. Garnish with an orange twist to tie everything together. This is my go-to when hosting dinner parties—it feels special but still approachable. 🍹
Nutrition facts
Frequently asked questions
Why do you recommend bone-in pork chops for this recipe?
Bone-in chops stay juicier and more flavorful than boneless cuts because the bone acts as an insulator, helping the meat cook more evenly. The bone also adds depth to the flavor profile, which pairs perfectly with the rich onion gravy. Plus, they're easier to handle during the searing process—they won't curl up as much as boneless chops.
Can I use boneless pork chops instead?
Yes, but you'll need to adjust the cooking time slightly. Boneless chops cook faster, so reduce the searing time to 2-3 minutes per side and check for doneness at 140°F internal temperature. Pound them to even thickness first to ensure they cook uniformly. The gravy method remains exactly the same—it's the chops that change.
What if my gravy turns out too thick or too thin?
If your gravy is too thick, whisk in 1 tablespoon of beef broth or water at a time until you reach a smooth, spoonable consistency. For thin gravy, mix 1 tablespoon flour with 1 tablespoon cold water, stir it in, and simmer for 1-2 minutes until thickened. The key is patience—let it reduce naturally rather than rushing the process.
How do I prevent the pork chops from sticking to the pan?
Make sure your skillet is properly preheated until it's smoking slightly, and use enough oil and butter (about 0.25 cup total) to create a protective layer. Pat the chops completely dry before dredging, and don't overcrowd the pan—cook in batches if needed. Press down gently on the chops during the first minute to help them release from the pan. The secret is heat and patience!
Can I make this recipe ahead of time?
Cook the pork chops and gravy as directed, then store them separately in the fridge for up to 3 days. Reheat the chops in a skillet over medium heat for 2-3 minutes per side to restore crispiness, then warm the gravy separately. For best results, reheat the gravy in a saucepan over low heat, stirring constantly. The flavors actually improve overnight!