
Main Courses
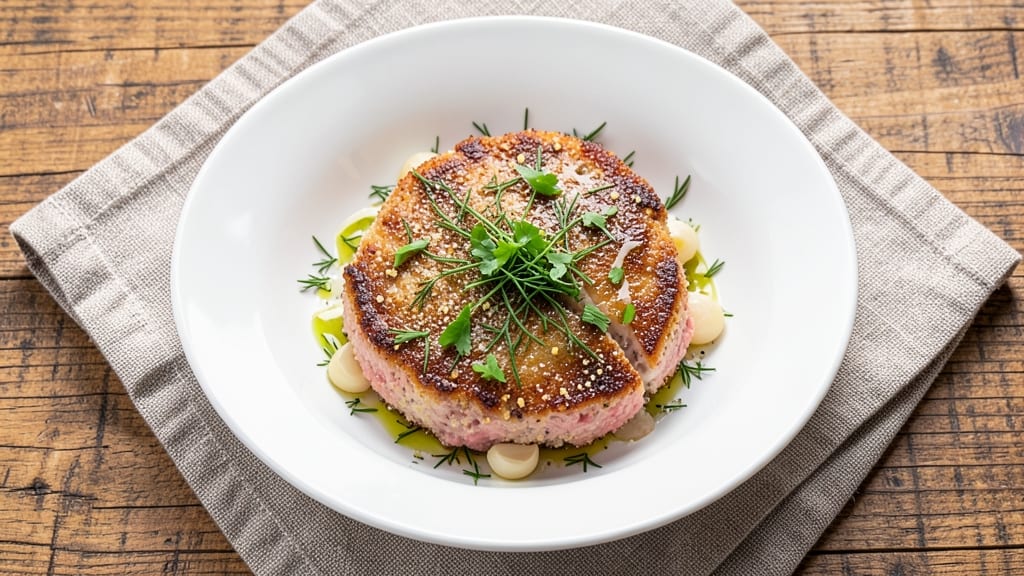
This minced pork cutlet recipe delivers the perfect balance of crispy golden crust and tender, herby-stuffed center—just like the schnitzel you crave. I developed this technique after years of perfecting the art of pan-fried pork, where the secret lies in a precise breading ratio and high-heat searing.
The herby stuffing transforms ordinary ground pork into something restaurant-worthy, while the breading stays crisp even after resting.
What sets this recipe apart is the dual-texture magic: a crispy, caramelized exterior that shatters with each bite, paired with a moist, flavorful interior thanks to the herby stuffing.
Traditional schnitzel methods call for pounding thin cuts, but mincing the pork creates an entirely different texture—richer, more compact, and packed with flavor in every bite. The key is using a combination of panko and all-purpose flour for maximum crispiness without sacrificing moisture.
By the time you serve these cutlets, you'll have golden-brown, shatteringly crisp edges that give way to tender, herby-stuffed pork inside. The technique ensures they stay hot and crisp even after resting, making them perfect for serving with lemon wedges, a simple salad, or roasted potatoes.
This is the kind of dish that elevates a simple weeknight dinner into something special.
The beauty of this method is its versatility—whether you're following traditional Austrian schnitzel techniques or adapting for modern preferences like gluten-free breading. The herby stuffing can be customized with your favorite herbs, and the crispy coating works equally well pan-fried or air-fried.
Let's get started on creating cutlets that will impress even the most discerning guests.
Ingredients for minced pork cutlet
Here's what you need to create restaurant-worthy minced pork cutlets with herby stuffing magic.
| Ingredient | Amount | Notes |
|---|---|---|
| Ground Pork 🥩 | 1 ¼ lb | 80% lean for best texture |
| All-Purpose Flour 🌾 | ¾ cup | For breading, sifted |
| Panko Breadcrumbs 🍞 | ½ cup | Japanese-style for extra crisp |
| Fresh Parsley 🌿 | ¼ cup | Finely chopped, stems included |
| Fresh Dill 🌿 | 0.15 cup | Finely chopped, fresh preferred |
| Garlic Cloves 🧄 | 3 cloves | Minced, fresh preferred |
| Large Eggs 🥚 | 1 whole | Room temperature for even coating |
| Vegetable Oil 🫒 | ½ cup | High smoke point, like canola |
| Salt 🧂 | 1 ½ tsp | Diamond Crystal preferred |
| Ground Black Pepper 🌶️ | ½ tsp | Freshly cracked |
| Lemon Juice 🍋 | 1 tbsp | Freshly squeezed |
| Unsalted Butter 🧈 | 2 tbsp | For basting, softened |
| Lemon Wedges 🍋 | 4 whole | For serving, fresh preferred |
The ground pork is where the magic starts—80% lean gives you that perfect balance of tenderness and crispiness. Trader Joe's and Costco usually carry it pre-ground, but if you're buying whole pork shoulder, trim off any visible fat before grinding. Fresh herbs are non-negotiable here: parsley and dill should be bright green, not wilted. If you can't find fresh dill, dried works at half the amount, but trust me on the fresh version. The garlic? Roasted for 10 minutes before mincing adds a sweet depth that changes the whole dish.
No panko? Regular breadcrumbs toasted in a dry pan for 3 minutes work in a pinch, but the Japanese-style panko gives you that shatteringly crisp crust. Short on parsley? Cilantro or basil at the same amount—just know it'll change the flavor profile slightly. The eggs need to be room temperature, or your breading will slide off. For extra crispiness, mix 1 tbsp cornstarch into the flour before dredging. And if you're air-frying, spray the basket with oil instead of preheating the oil in a pan.
Keep the herbs fresh by wrapping them in damp paper towels and storing in a sealed container—lasts 5 days in the fridge. The ground pork can be prepped ahead and shaped into patties, then frozen for 3 months. For serving, I like to keep the lemon wedges warm by placing them on a small plate in the oven at 200°F for 5 minutes while the cutlets rest. These reheat beautifully—just 5 minutes in a 350°F oven with a splash of water in the pan.
Why You'll Love This Recipe
- No-Fuss Assembly: I swear, this recipe is the kind of meal that lets you multitask—shape the pork patties while the pan heats, toss in the parsley and dill at the last second, and boom. The panko crust forms in minutes, no fancy rolling required. Honestly, it’s the kind of hands-off cooking that makes me feel like a pro.
- Herb-Packed Punch: That bright burst of fresh dill and parsley? It cuts through the richness of the pork like a cool breeze on a summer day. The panko gives it that addictive crunch, while the flour keeps it tender inside—so you get that perfect contrast with every bite. (Yes, even on a Tuesday night.)
- Lunchbox Hero: These cutlets reheat like a dream—toss a few in a container with some lemon wedges, and you’ve got a packed lunch that’ll have coworkers asking for the recipe. Between us, I’ve sent these to work meetings, potlucks, and even my kid’s soccer practice (they’re a hit, okay?).
- Budget Crunch-Saver: Ground pork is my wallet’s best friend, and this recipe stretches it perfectly—no waste, no fuss. Double the batch, freeze half, and you’ve got a ready-to-cook meal for when you’re too tired to think. I’ll be real: it’s become my go-to for those “I don’t wanna spend $20 on takeout” nights.
Step-by-step instructions for minced pork cutlets
Here's how to craft golden, crispy cutlets with a herby stuffing that keeps every bite juicy.
Prepare the Herby Stuffing Mixture
In a small bowl, combine the 0.25 cup fresh parsley and 0.15 cup fresh dill, then finely chop them together. Add the 3 minced garlic cloves, 1.5 tsp salt, and 0.5 tsp ground black pepper, mixing until evenly distributed. This aromatic blend will infuse the pork with bright, fresh flavors while keeping the texture tender.
Next, transfer the mixture to a medium bowl and add the 1.25 lb ground pork. Using your hands, gently work the pork and herbs together until fully incorporated—just until combined, not overworked. The goal is to distribute the flavors evenly without compacting the meat too much, which could make the cutlets dense.
Form and Chill the Cutlets
Divide the pork mixture into 4 equal portions (about 4 ounces each), then shape each into a ¾-inch thick oval on a parchment-lined plate. Press down gently but firmly to create a smooth, even surface—this ensures even cooking and a consistent texture. Place the plate in the refrigerator and chill for 30 minutes to firm up the cutlets.
Chilling is crucial here. It allows the cutlets to hold their shape better when you bread them, preventing them from falling apart in the pan. While they're chilling, prepare your breading station: place the 0.75 cup all-purpose flour in one shallow dish, the 0.5 cup panko breadcrumbs in another, and beat the 1 whole large egg in a third dish with a fork until frothy.
Bread the Cutlets for Maximum Crispness
Remove the cutlets from the fridge and, working one at a time, dredge each in the all-purpose flour, shaking off any excess. Dip into the beaten egg, letting the excess drip off, then press into the panko breadcrumbs, coating all sides evenly. Place the breaded cutlets on a wire rack set over a baking sheet to keep them crisp.
Here's the thing—don't rush this step. Press the panko firmly onto the cutlets so it adheres well, especially on the sides. The panko will give you that irresistible crunch, while the flour helps create a golden crust. Let the breaded cutlets rest for 5 minutes before cooking to allow the flour to absorb any moisture, ensuring a better seal.
Pan-Fry to Golden Perfection
Heat 0.25 cup vegetable oil in a large skillet over medium heat until it shimmers but doesn't smoke—around 350°F. Add the cutlets in a single layer, leaving space between them to prevent steaming. Cook for 3-4 minutes per side until they're deep golden brown and the internal temperature reaches 160°F.
Resist the urge to press down on the cutlets with a spatula—they'll release when they're ready. If the oil starts to smoke excessively, reduce the heat slightly to maintain an even temperature. Once golden, transfer the cutlets to a paper towel-lined plate to drain excess oil, but leave them warm while you finish the sauce.
Finish with Lemon Butter and Serve
In the same skillet, melt the 2 tbsp unsalted butter over medium-low heat, then add the 1 tbsp lemon juice. Stir to combine, then pour the sauce over the cutlets. Let them sit for 1 minute to absorb the flavors, then serve immediately with the 4 lemon wedges on the side.
The lemon butter adds a bright, tangy finish that cuts through the richness of the pork, balancing the herby stuffing. The cutlets should be crisp on the outside, juicy on the inside, and infused with layers of flavor. Serve with a simple arugula salad or roasted vegetables to complement the dish.
Pro Tips For Making Minced Pork Cutlet
- Press the Patties: Skip the temptation to flatten them too thin—aim for about ½-inch thickness. I used to crush them flat, and they’d dry out before the crust formed. Thicker patties stay juicy while still getting that crispy breadcrumb shell.
- Chill Before Breading: Pop the shaped patties in the fridge for 15 minutes after mixing. Cold meat holds together better when you add the flour and panko, so your cutlets won’t crumble apart when frying. (Yes, even if you’re impatient like me.)
- Double-Coat the Crust: Don’t just dip—dredge, then press extra panko onto the sides. The first layer sticks to the flour, but the second layer guarantees that golden, shatterable crust. I learned this after my first batch came out looking like sad, greasy pancakes.
- Fry in Batches: Crowding the pan lowers the temperature and steams the pork instead of searing it. Use two minutes per side max—you want a crust, not a soggy mess. If you’re frying more than four at once, wait until the first batch is done before starting the next.
Storing and reheating this dish
Refrigerator Storage
Store your cooked minced pork cutlets in an airtight container with parchment paper between layers to maintain crispiness. They'll stay fresh in the fridge for up to 3 days—just reheat gently to avoid sogginess.
I keep them in my glass Pyrex containers with snap lids because they hold heat better than plastic. 🥩
Freezer Prep Tips
For longer storage, freeze uncooked cutlets on a parchment-lined tray for 1 hour to prevent sticking, then transfer to a freezer bag. Cooked cutlets freeze beautifully for 2 months—wrap them individually in foil first to lock in crispness.
Thaw overnight in the fridge before reheating. I use quart-sized freezer bags for portion control.
Oven Reheating
My preferred method is reheating at 350°F for 10-12 minutes on a wire rack over a baking sheet. This preserves the crispy crust while warming through.
Add 1 tbsp water to the pan to create steam and prevent drying. For extra crunch, broil for 1-2 minutes at the end—just watch closely! 🔥
Air Fryer Revival
For a quick crispy finish, use your air fryer at 375°F for 4-5 minutes, shaking halfway. The high heat mimics pan-frying while using less oil.
I like to spray the basket with avocado oil before adding the cutlets. This method works best with single-layer reheating to maintain even heat distribution.
Lemon Butter Refresh
Always finish reheated cutlets with 1 tbsp melted butter and ½ tbsp lemon juice—this restores the bright, tangy balance lost during storage. The acidity helps break down any dried breading, making each bite feel fresh again. Serve immediately with warm lemon wedges for that restaurant-quality touch. ✨
Nutrition facts
Frequently asked questions
Can I use ground turkey or chicken instead of pork?
You can absolutely substitute! Ground turkey (especially lean) works well, but chicken tends to dry out faster. For turkey, use 93% lean and reduce cooking time by 30 seconds per side. Chicken needs even more care—add 1 tbsp mayo or Greek yogurt to the herby mixture to keep it moist. The breading method stays identical.
Why did my cutlets fall apart when cooking?
This usually happens from overworking the pork or skipping the 30-minute chill. The herbs and fat need time to bind properly. Also, if your oil isn't hot enough (350°F), the breading won't set. Try pressing the cutlets more firmly when shaping, and use a meat thermometer to verify oil temperature.
How do I make this gluten-free?
Replace the flour with ½ cup gluten-free all-purpose blend and use ⅓ cup crushed gluten-free cornflakes instead of panko. For the egg wash, mix 1 tbsp cornstarch with 2 tbsp water to create a slurry—this helps the coating adhere. The texture will be slightly different but still delicious!
Can I bake these instead of pan-frying?
Yes! Preheat oven to 425°F and bake on a wire rack for 12-15 minutes, flipping halfway. Brush with oil before baking for crispiness. The breading may not get as golden as pan-frying, but it's a great lower-fat alternative. For extra crunch, broil for 1-2 minutes at the end.
What's the best way to serve these with kids?
Cut into ½-inch strips for easy handling, and serve with apple slices or cucumber rounds for dipping. Kids love the crispy texture! For picky eaters, omit the herbs and use ½ tsp onion powder** instead. The lemon butter sauce is always a hit—just serve it on the side for dipping.